To turn off the Snipping Tool on Windows 11, you can utilize various methods to prevent access to this screenshot utility, ensuring that it’s no longer available for capturing your screen. One effective approach is learning how to stop the Snipping Tool using Registry settings in Windows 11, which involves modifying system configurations to disable the tool entirely.
This guide will show you two ways to turn off the Snipping Tool and offer alternative screenshot options.
Quick Solution:
- Go to Settings > Accessibility > Keyboard.
- Toggle off the option “Use the Print Screen key to open Snipping Tool”.
Disable the Snipping Tool in Windows 11
Learn how to disable the Snipping Tool in Windows 11 with following two effective methods:
Method 1: Disable the Snipping Tool through Settings
If you prefer the normal behavior of the Print Screen key to take a screenshot and copy it to your clipboard rather than opening the Snipping Tool, you’re in luck! Windows 11 includes a simple setting for restoring this functionality. Follow the steps below to easily disable the Snipping Tool’s control over the Print Screen key.
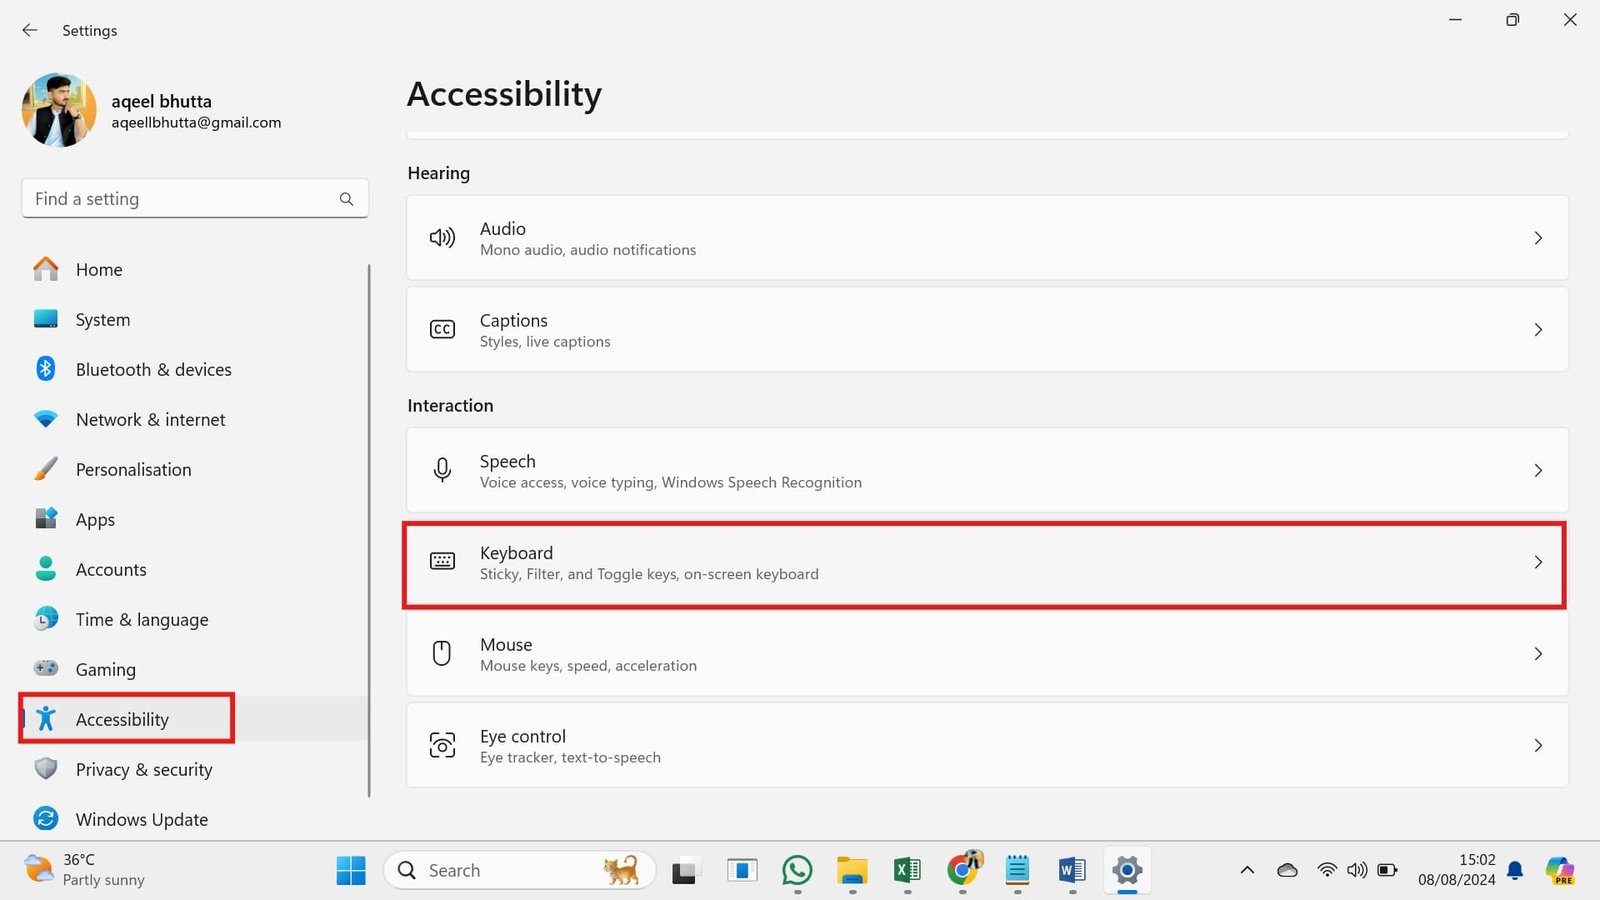
- Open Settings or Press Windows + I.
- Go to Accessibility > Keyboard.
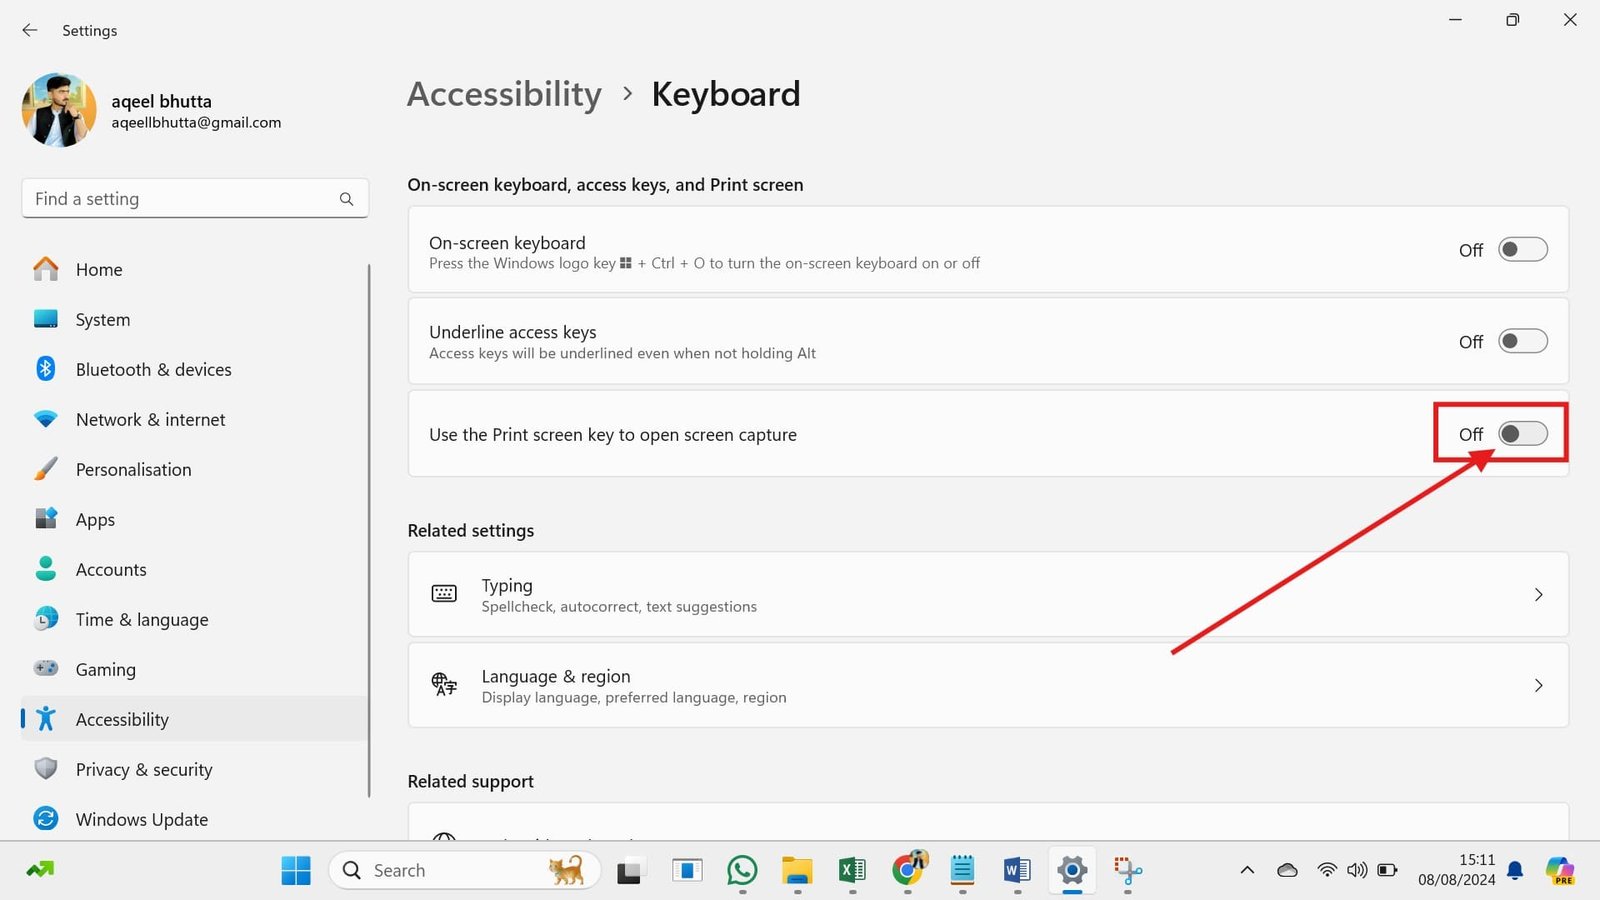
3.Scroll down and turn off the switch that says ‘Use Print Screen key to open screen capture’.
Method 2: How to Turn Off Snipping Tool in Windows 11 through Registry
While Windows 11 includes a convenient Snipping Tool for taking screenshots, some users may prefer to disable it. If you’ve tried the simpler methods but still want to completely remove the Snipping Tool from your system, you can edit the Windows Registry. This method should be used with caution because causing incorrect changes can have an impact on the stability of your system. However, if done correctly, it will properly disable the Snipping Tool. Let’s look at the steps involved.
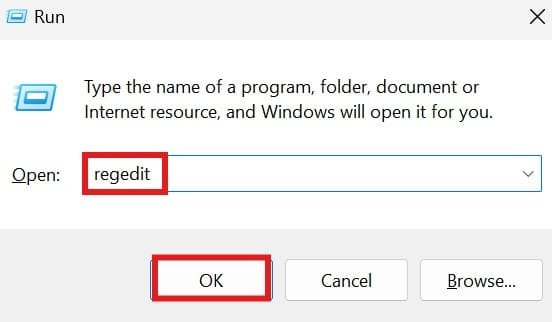
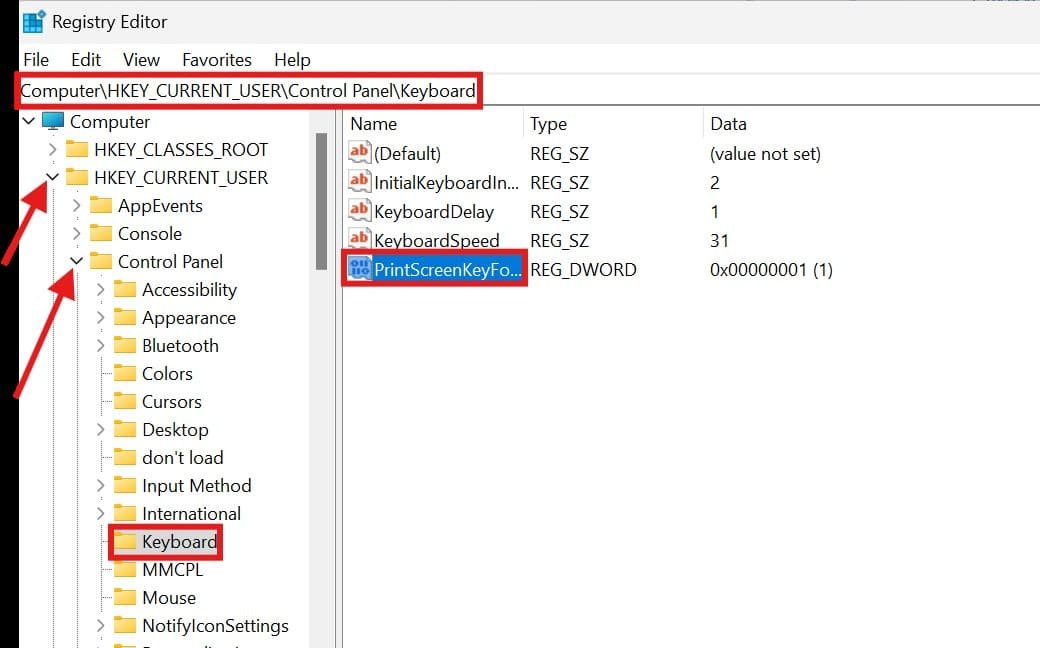
- Press Win + R, to open the registry type regedit, and press Enter.

- Navigate to the following path:
- Computer\ HKEY_CURRENT_USER\Control Panel\Keyboard

- On the right side, locate PrintScreenKeyForSnippingEnabled DWORD and double-click it.
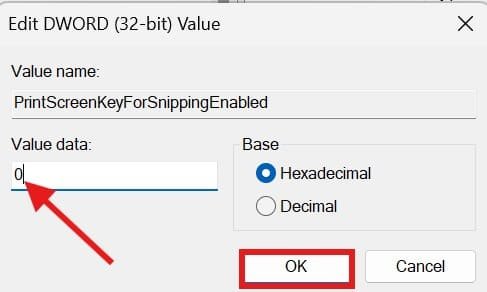
- In the Edit Value Box, enter ‘0’ in the Value Data Field.
- Press the OK button.

Take a Screenshot in Windows 11 without the Print Screen Button
If you’ve disabled the Snipping Tool and need to capture screenshots , here are some alternatives:
- There are several ways to take a screenshot without using the PRTSc SysRQ To take screenshots, use the short key Win+Shift+S on your keyboard.
- Press Win + G to open the Game Bar. You can use it to capture screenshots and record gameplay in Windows 11 .
- Many free and paid screenshot tools offer additional features like editing and annotations.
Conclusion
Disabling the Snipping Tool in Windows 11 involves editing the Registry, which can be complex. If you simply want to prevent the Print Screen shortcut from triggering the Snipping Tool, adjusting the Accessibility settings is easier. For alternative screenshot methods, consider using the Game Bar or third-party tools.
FAQs: How to disable the snipping tool in Windows 11
Will disabling the Snipping Tool affect other apps?
A: No, disabling the Snipping Tool only affects the built-in Windows tool. Other apps that use screenshot functionality should work normally.
How can I re-enable the Snipping Tool?
A: To re-enable the Snipping Tool, delete the “DisableSnippingTool” value you created in the Registry.
Q: Are there any other ways to take screenshots in Windows 11?
A: Yes, you can use the built-in Game Bar (Win + G) or explore third-party screenshot tools for additional features.