Is your laptop keyboard causing you trouble? Maybe it’s typing the wrong letters, or you spilled something on it and need to clean it. Disabling a laptop keyboard in Windows 11 can be useful for various reasons, such as when you want to use an external keyboard or if the built-in keyboard is malfunctioning. Whatever the reason, this comprehensive guide will teach you how to disable the keyboard on your Windows 11 laptop temporarily and then permanently using various methods.
Additionally, we’ll discuss how incorrect drivers can lead to the dreaded Blue Screen of Death and offer easy fixes and tips for common laptop keyboard issues.
Let’s dive into disabling the keyboard in Windows 11/10, which would be great for troubleshooting.
Quick Solution
- To Disable Keyboard Temporarily: From Device Manager >> Find Keyboards >> right-click your keyboard name >> and click Uninstall device.
- Your Windows 11 keyboard becomes functional again on restart.
- To Disable Keyboard Permanently: Win + R >> Type sysdm.cpl >> Hardware >> Device Installation Settings Choose No >> Save Changes
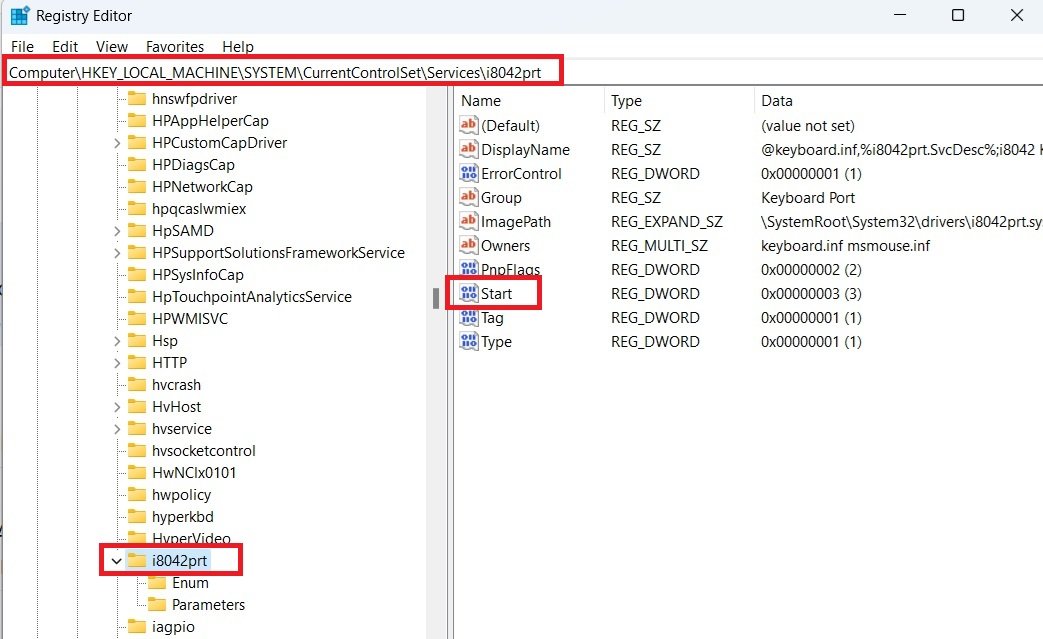
- To Disable Keyboard Using Registry Editor: Press Win + R >> Type regedit > Go to
HKEY_LOCAL_MACHINE\SYSTEM\CurrentControlSet\Services\i8042prt >> Double-click on “Start” >> change the value to 4 >> Restart your PC - To lock the keyboard: Press “Win + L”; it will bring up the Windows lock screen.
Now, let’s find out all the solutions to temporarily disable the keyboard on your Windows 11 laptop and then permanently.
How to Disable a Laptop Keyboard in Windows 11/10
Disabling your laptop keyboard in Windows 11/10, whether temporarily or permanently, through Device Manager or even using the Registry Editor for a more permanent solution.
Disabling Your Laptop Keyboard Temporarily?
Turning off your Windows 11 laptop keyboard temporarily is useful if you need to clean it. With this method, your keyboard becomes nonfunctional and will be completely disabled until you restart your computer.
Important Note*: Make sure that you have attached the mouse to your laptop so that you can control it. If you have a touch-screen laptop, you can use your finger to tap and swipe instead, just like you would on a phone or tablet.
To temporarily disable your laptop keyboard:
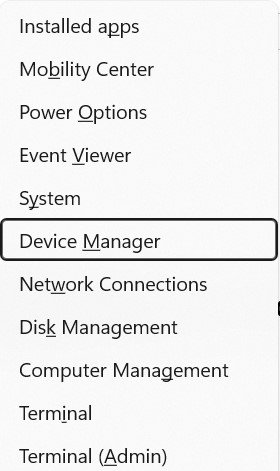
- Press “Windows key + X” and then select “Device Manager.”
2. Find the “Keyboards” section and click the triangle/arrow located at the left to show all your keyboards and connected devices 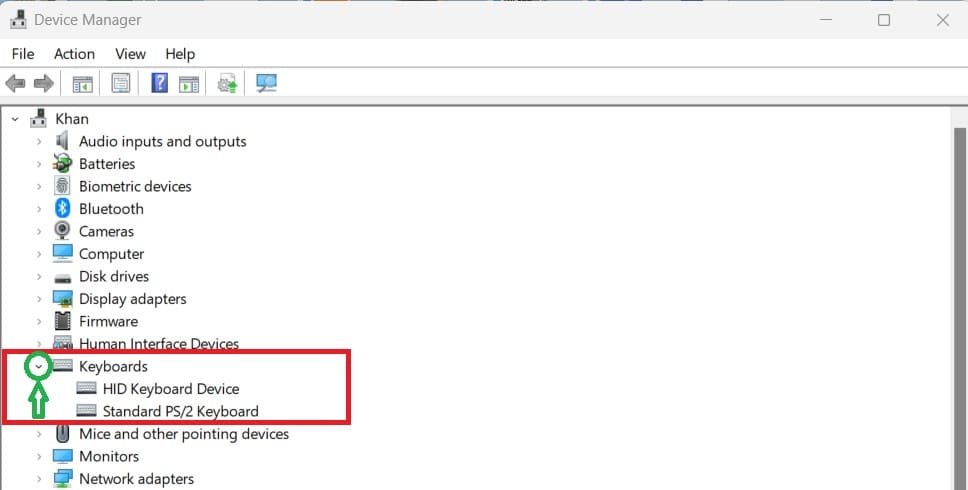
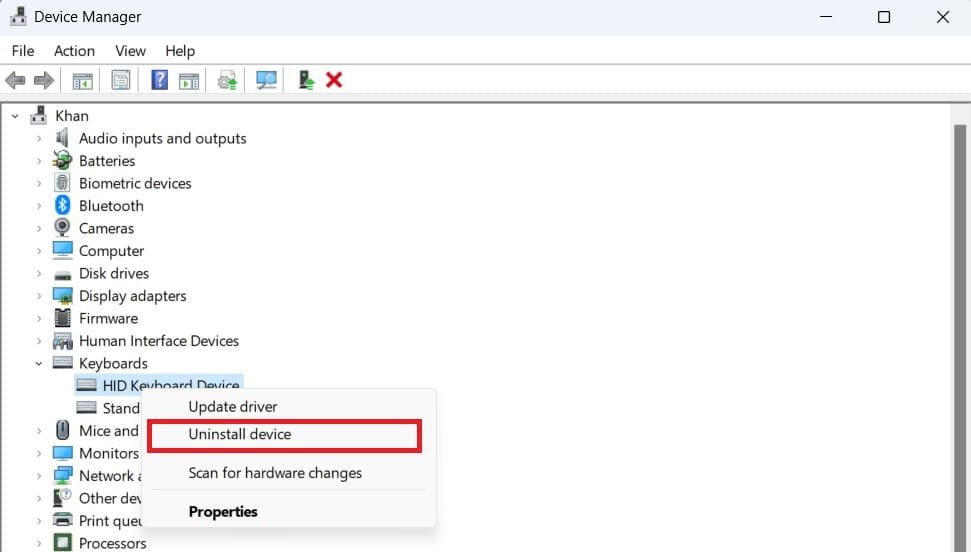
3. Right-click on your keyboard’s name (usually the first one is keyboard; in my case, it is “HD Keyboard Device”) and select “Uninstall device.
Note: Your Windows 11 laptop keyboard’s name depends on your device model and the manufacturer.
4. Click on “Uninstall” to confirm the process.
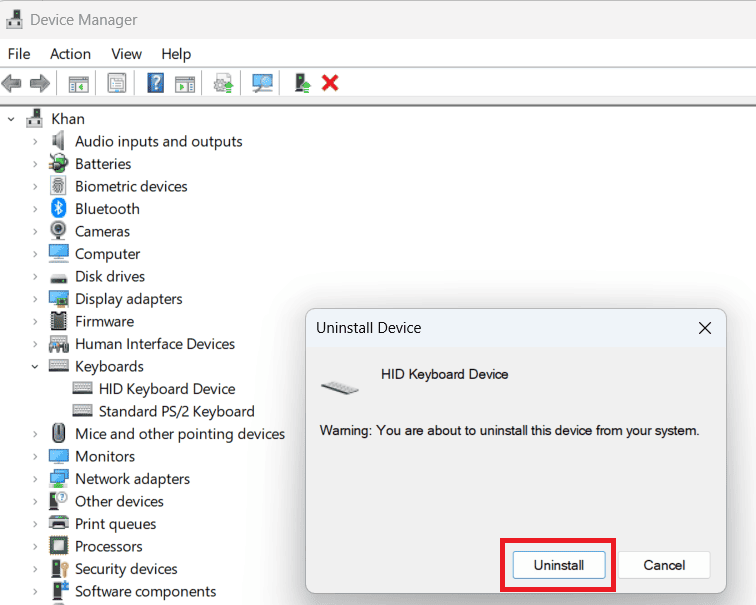
5. Your laptop keyboard and its trackpad will be disabled temporarily, and to enable it, you need to simply restart your device.
Uninstalling your laptop’s keyboard with a temporary method works fine. But when you restart or reset your laptop, Windows 11 automatically reinstalls the keyboard driver, and your device will come back to its normal working.
The problem, like turning off the Caps Lock notification, occurs when you need to turn off your laptop keyboard permanently; the above method won’t work. Luckily, there’s a quick fix to stop this completely. Keep reading to find out how to permanently disable your laptop keyboard in Windows 11.
Permanently Disable the Keyboard on a Laptop in Windows 11?
The following method will lock the keyboard on a laptop permanently. Let’s find out how.
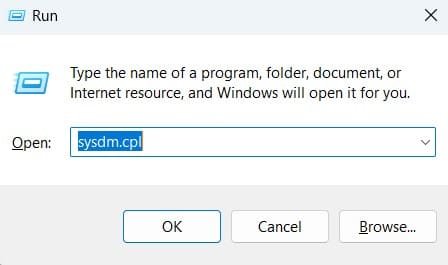
- Press the “Windows key” and the letter “R” on your keyboard at the same time. Then, type “sysdm.cpl” in the box that pops up and press Enter (it will open the System Properties window).
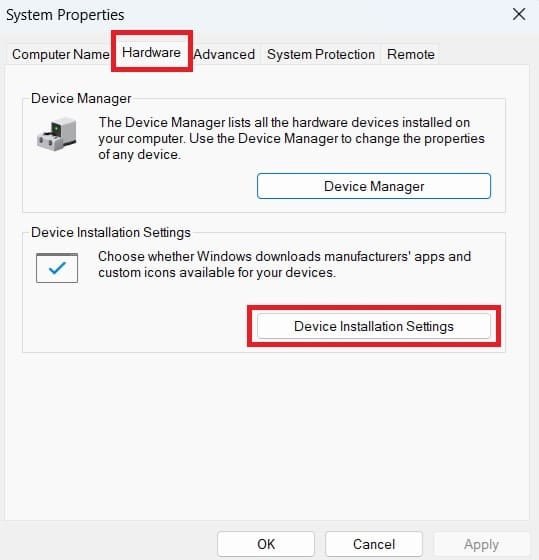
2. Click on the “Hardware” tab and then select the “Device installation settings.”.
3. Select the option “No (your device might not work as expected).”.
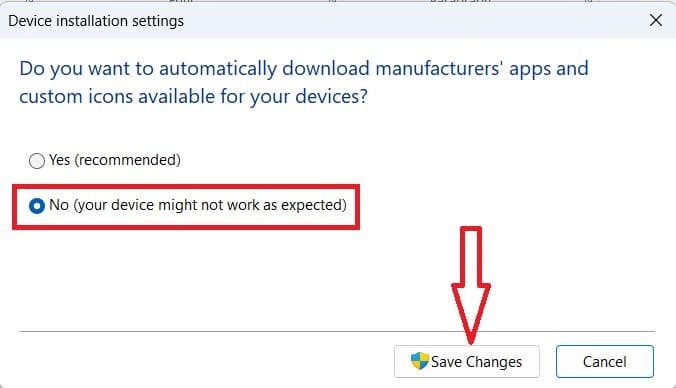
4. Finally, click on “Save Changes.”.
Note: To undo changes, just repeat the first 3 steps and then choose “Yes (recommended)” instead of “No…”
Disabling the Keyboard on a Laptop Permanently Using the Registry Editor?
- Press Win + R to open Registry Editor, type regedit, and press Enter.
- Navigate to the Keyboard Settings with the path:
HKEY_LOCAL_MACHINE\SYSTEM\CurrentControlSet\Services\i8042prt

- Double-click on “Start” and change the value to 4 (which disables the keyboard driver).

- Click OK and restart your computer.

Permanently Lock the Keyboard on a Laptop in Windows 11?
There is no direct way to lock the keyboard on your laptop or PC in Windows 11 or 10. However, to lock the keyboard, we have to lock the Windows screen, and to achieve this:
- Press Windows + L at the same time
- You’ll be at Windows Home Screen lock
- To unlock the keyboard, enter your PIN or password on the lock screen. Doing so, your laptop gets back to working condition again.
How can I disable your laptop’s built-in keyboard while using an external keyboard?
To disable your laptop’s built-in keyboard while using an external keyboard, follow these steps based on your operating system:
For Windows
- Disable via Device Manager:
- Press
Win + Xand select Device Manager. - Expand the Keyboards section.
- Right-click on your laptop’s built-in keyboard (usually labeled as “Standard PS/2 Keyboard”).
- Select Disable device (if the option is available).
- Confirm and restart your computer.
If the “Disable device” option is unavailable, you can uninstall the driver:
- Right-click on the keyboard and select Uninstall device.
- Restart your computer. This disables the keyboard until Windows reinstalls the driver (which might happen after a reboot).
- Press
- Use Third-Party Software:
- Tools like KeyTweak or SharpKeys can help disable specific keys or the entire keyboard.
- Download and install the software, then follow the instructions to remap or disable the built-in keyboard.
- Modify Group Policy (Pro Editions of Windows):
- Press
Win + R, typegpedit.msc, and press Enter. - Navigate to:
Computer Configuration -> Administrative Templates -> System -> Device Installation -> Device Installation Restrictions. - Enable the prevention of the installation of devices that match any of these device IDs.
- Get your keyboard’s hardware ID from Device Manager, add it, and apply the policy.
- Press
For macOS
- Using Accessibility Settings:
- Go to System Preferences > Accessibility.
- Navigate to Keyboard > Hardware.
- Check the box for Enable Mouse Keys. This will effectively disable the keyboard (though it’s a workaround).
- Use a Terminal Command:
- Open the Terminal and enter the following command:
sudo kextunload /System/Library/Extensions/AppleUSBTopCase.kext/Contents/PlugIns/AppleUSBTCKeyboard.kext - This disables the keyboard until the next reboot.
- Open the Terminal and enter the following command:
- Install Third-Party Apps:
- Apps like Karabiner-Elements can disable specific keys or the entire built-in keyboard.
Precautions
- Ensure your external keyboard is connected and functioning before disabling the internal keyboard.
- Re-enabling the built-in keyboard may require reversing the steps, so keep a backup of your changes or notes on what you modified.
Incorrect Driver Method May Result in Blue Screen of Death
The process of permanently disabling and locking a laptop’s keyboard can harm your device and may result in a Blue Screen of Death (BSOD) (where everything freezes and shows a scary blue screen). So, you need to be careful with this method, and you should avoid it. Because it involves installing the wrong driver, which can be risky. It’s best to skip this method and stick to the safer options we’ll talk about next.
Easy Fixes and Tips for Common Laptop Keyboard Issues
Disabling your laptop keyboard might not be necessary. Here are some safer ways to secure your laptop to try:
- Use a different keyboard: If your keyboard is just acting weird, you can try plugging in a regular USB keyboard or connecting a Bluetooth keyboard.
- Detach your keyboard (if you have a Surface): If you have a Surface laptop or tablet, you can physically remove the Type Cover keyboard from the screen.
- Use the on-screen keyboard: Windows 11 has a touch keyboard you can use by tapping on the screen (if your laptop has a touchscreen) or by clicking with your mouse.
Why Can’t I Disable My Laptop Keyboard?
If you’re having trouble disabling your keyboard, there are likely a few main reasons behind your frustration.
- Wrong Keyboard: Double-check that you’re changing the settings for the built-in keyboard in Device Manager, not an external one.
- Restart Re-enabled: The first method only works until you restart your laptop. Try putting your laptop to sleep instead.
Windows Update Reset: Windows updates can sometimes undo changes made to your devices. Try disabling the keyboard again after an update.
How to turn on the keyboard light in Windows?
Turning on the keyboard backlight in Windows can enhance your typing experience in low-light environments, and it’s easy to activate if your laptop supports this feature.
- Using Keyboard Shortcuts:
- Many laptops have a dedicated keyboard shortcut to control the keyboard backlight. Look for a key with a light symbol (often
F3orF4), and press it with theFnkey (e.g.,Fn + F3orFn + F4).
- Many laptops have a dedicated keyboard shortcut to control the keyboard backlight. Look for a key with a light symbol (often
- Through Windows Settings:
- Open Settings (
Win + I). - Go to Devices > Typing > Advanced Keyboard Settings.
- Look for an option to adjust backlighting, if available (varies by laptop model).
- Open Settings (
- Using Manufacturer Software:
Some laptop manufacturers (like ASUS, Dell, and HP) provide their own utility software (e.g., ASUS Armoury Crate, HP Command Center) to control keyboard lighting settings.
If these options don’t work, it’s possible that your laptop doesn’t support backlit keyboards.
Conclusion
In conclusion, disabling your laptop keyboard in Windows 11/10 can be done temporarily through Device Manager, but it won’t be permanent. Permanently disabling the keyboard using driver uninstallation is risky and can cause system instability. Instead, consider using an external keyboard, an on-screen keyboard, or detaching the keyboard (if applicable) for troubleshooting purposes.
FAQs: How to Disable a Laptop Keyboard in Windows 11/10
How to turn off a computer or Laptop with the keyboard?
- Press
Alt + F4on the desktop to open the shutdown menu. - Use the arrow keys to select Shut Down and press
Enter. - Alternatively, press
Ctrl + Alt + Del, then use the Tab or arrow keys to navigate to the power icon and select Shut Down.
How to disable a laptop keyboard permanently in Windows 11?
- Open Device Manager (
Win + X> Device Manager). - Expand Keyboards and right-click your laptop's built-in keyboard.
- Select Uninstall device and confirm.
- Disable automatic driver updates:
- Go to Control Panel > System > Advanced System Settings > Hardware tab > Device Installation Settings > Select No.
- Restart your laptop to apply the changes.
This will prevent the keyboard from reinstalling and disable it permanently.
What to do if you cannot disable the keyboard in Device Manager?
Try Uninstalling the Keyboard:
- Open Device Manager (
Win + X> Device Manager). - Right-click the built-in keyboard under Keyboards and select Uninstall device.
- Restart the computer, and it should reinstall the driver, but the keyboard may remain disabled.
Use Third-Party Software:
Consider using third-party software like KeyFreeze or Keyboard Locker to lock or disable the keyboard.