You can clone Windows 11 to an SSD in just a few steps. Upgrading your old internal drive to a new and faster SSD (Solid State Drive) is a fantastic way to boost your computer’s speed. Normally, after installing an SSD on the PC, you install a new version of Windows along with the necessary programs and software.
In this guide, we will show you how to easily clone your current Windows 11 setup to your new SSD. We’ll also explain how you can move your installed programs, like Mullvad VPN, Microsoft Office, and RAR software, and share files and folders from your old HDD to the new SSD.
Let’s start migrating Windows 11 to a new hard drive or SSD.
How to migrate Windows 11 to a new hard drive.
Before cloning Windows 11 to a new SSD, you need to do some preparation.
Download Windows 11 OS Migration Software (EaseUS Partition Master)
Upgrading can be a hassle, but EaseUS Partition Master can help! This easy-to-use software lets you transfer your entire operating system to a new drive without reinstalling Windows or losing your files.
EaseUS Partition Master is more than just a migration tool. It can also be used to manage your disk space by creating partitions and optimizing your drive’s performance.
How to Install a New Hard Drive into Your Computer
Here’s how to install a new hard drive into your PC:
- By using Phillips or any other head screws on the side panel, open your computer case. Just unscrew them and carefully remove the panel.
- Find the SATA data cable (usually thin and flat) and power cable (thicker with multiple connectors). Plug them into the corresponding ports on your internal drive. Then, slide the drive into your case’s free drive bay (these are typically cages with metal brackets).
- Some drives may need screws to hold them in the bay. Tighten them gently with a screwdriver.
- Double-check that all cables are securely connected and that nothing is loose inside. Put the side panel back on and screw it shut.
How to Install a Solid State Drive into Your Computer
- Open your PC case (by using a screwdriver on the side panel to open the screws).
- Connect the SATA cable to both the SSD and your motherboard’s SATA port.
- If you have purchased a new NVMe/M.2/Pie SSD, then gently insert the SSD into the designated slot on your motherboard.
- Close your computer case and tighten the screws.
Note: Before opening your PC, unplug everything except the monitor, keyboard, and mouse. This reduces the risk of shocks or shorts. See if there’s an empty slot for your new drive inside your computer. If not, you might need to use an external enclosure (sold separately) that connects with a USB cable.
Get Your New Drive Ready for Windows 11 It’s Easier Than You Think!
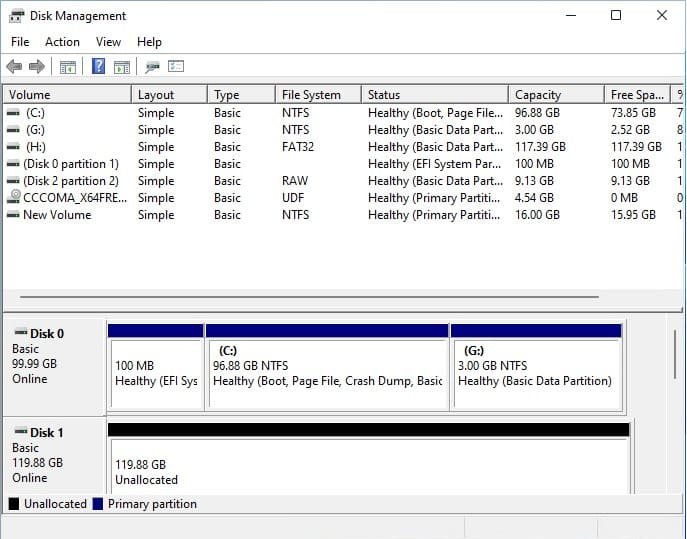
To clone Windows 11 on an SSD (a brand-new hard drive), it must undergo a specific format known as GPT. Here’s a quick guide to getting your new drive ready for Windows 11:
- After installing the new disk (refer to step 2 of the full guide), simply restart your PC.
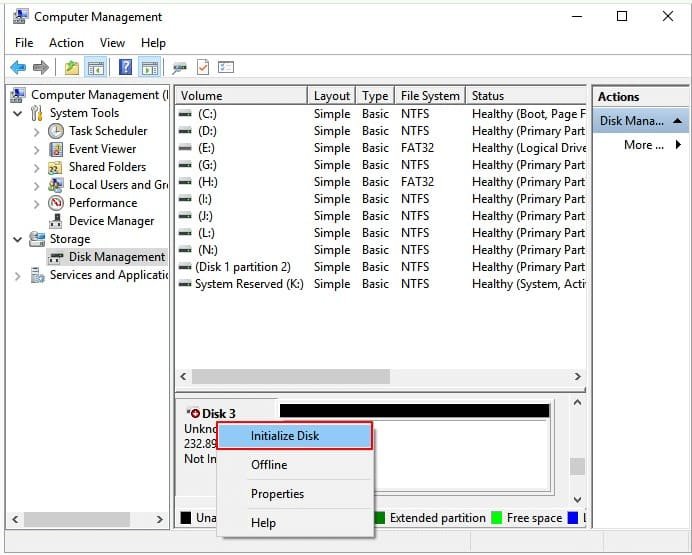
- Right-click the Windows icon on your taskbar and choose “Disk Management” (for quicker access, you can also search for “Disk Management” in the Start menu).
- Locate your new disk in Disk Management (it may appear as “Unallocated”). Right-click on it and select “Initialize Disk.”

- After initializing your new disk, you’re prepared to transfer Windows 11 to it!
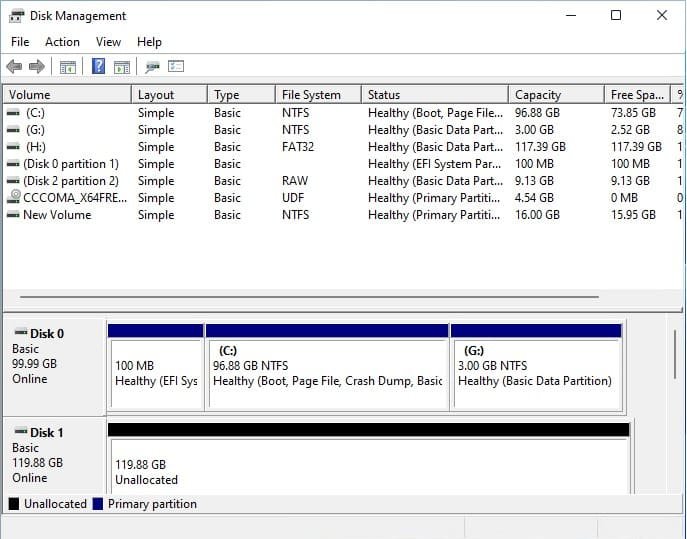
An Easy Guide to Migrating Windows 11 to a New SSD (Solid State Drive)
Switching to a new external drive doesn’t have to be a hassle. You don’t need to reinstall Windows 11 every time you upgrade your storage. This simple guide will help you move your entire system—files, programs, and settings—to the new drive with just a few clicks. Now, when considering efficiency for tasks like this, you might be wondering: Which OS is optimized for web apps? Windows 11 is designed with smooth integration and performance for web-based applications, making it a solid choice.
EaseUS Partition Master Software is simple to use, even if you’ve never messed with “partitioning” before (which is just a fancy way of organizing your disk drive). EaseUS Partition Master has clear instructions that walk you through the whole process, step by step. Thus, your new drive can run Windows 11 quickly!
Here are the steps to migrate OS to HDD or SSD:
- Launch EaseUS Partition Master, and on the left menu, click “Clone.”
- Choose “Migrate OS” and click “Next.”
- Select your new SSD or HDD as the target disk, and then click “Next.”
- Click Yes.
- Examine the preview disk layout. You can make changes if needed.
- Click “Start” to begin migrating your OS.
Once finished, you’ll see two options:
- Reboot Now: This immediately restarts your computer and boots from a new disk. Select this option to initiate the upgrade immediately.
- Done: This allows you to manually restart your computer at a later time. Select this option if you need to prepare the new OS before switching over.
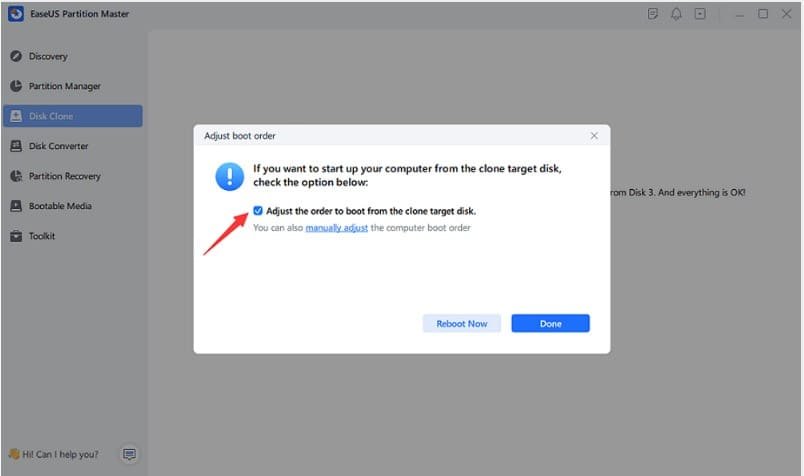
Important Note: Make sure the new drive has enough free space! If it’s already full, migrating your OS will erase everything on that drive. To avoid losing important files, back them up to an external drive beforehand.
EaseUS Partition Master allows you to move your entire Windows 11 system, including all of your programs and files, to a new drive. So, you don’t need to reinstall any program, software, or entire Windows.
Make Windows 11 Bootable on a New Hard Drive/SSD
Now, to make Windows 11 bootable on your new SSD or internal drive, follow these steps:
- Restart your computer.
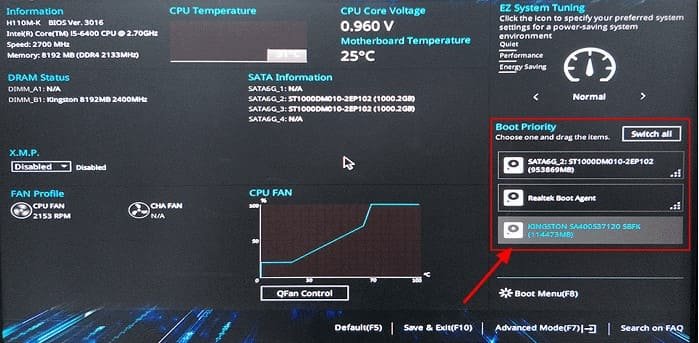
- Enter BIOS Setup: As your computer restarts, repeatedly press the F1, F2, Del, or Delete keys (this key depends on your motherboard).
- To save and restart, press the common key F10.
Set the new drive to be a boot drive. Look for the “boot order” section in BIOS and set your new SSD or HDD as the first boot option.
Why You Need to Migrate Windows 11 to a New SSD?
You’re probably running out of storage space on your current hard drive. Alternatively, your old hard drive may be experiencing a slowdown. There are multiple reasons why you might need to migrate or transfer Windows 11 to a brand new hard drive:
Get More Storage Space
With time, your PC fills up with files, programs, Windows updates, photos, and videos. The more space you have, the slower your computer will be overall. However, if the C drive becomes full, Windows will also slow down your computer. So, moving to a new, higher-capacity hard drive gives you a lot of free space again.
Improves Performance
Newer hard drives and solid-state drives (SSDs) are much faster than older hard disk drives (HDDs). Using an SSD will speed up program loading times and overall system responsiveness.
Fixes Drive Failures
If your current drive is making strange noises, showing error messages, or having other issues, it’s smart to migrate Windows 11 to a fresh new drive before total drive failure.
Benefits of Moving Your OS to an SSD
- Lightning Fast Speed: SSDs are much faster than traditional hard drives, allowing for quicker boot times and a more responsive system.
- Faster Game Play: For all your favorite games, enjoy smoother gameplay and faster loading times.
- Save Time: Migrating your OS is easier than reinstalling everything from scratch.
- More Space: Free up space on your old internal drive for all your important files.
How do I partition a hard disk in Windows 11?
- Press Windows + X and select Disk Management.
- Right-click on the drive you want to partition and select Shrink Volume.
- Enter the amount of space to shrink and click Shrink.
- Right-click the unallocated space and select New Simple Volume.
- Follow the wizard to assign a drive letter, format, and create the partition.
Top 10 free OS migration software for Windows 11
- Macrium Reflect Free
- EaseUS Todo Backup Free
- AOMEI Backupper Standard
- MiniTool Partition Wizard Free
- Clonezilla
- Paragon Backup & Recovery Free
- Acronis True Image (Trial)
- Rufus (for creating bootable USB drives, also useful for migration)
- DriveImage XML
- Samsung Data Migration (for Samsung SSDs)
These tools help you migrate, clone, or back up your OS and data for free.
Related: How to Open Command Prompt in Windows 11
Conclusion
In conclusion, following the above steps exactly, you can clone Windows 11 to an SSD easily. This guide shows you how to use EasyUS Partition Master to clone your entire Windows 11 system, including programs and files, to the new drive. This avoids the hassle of reinstalling everything. With a few simple steps and a free tool, you’ll be enjoying the speed boost of an SSD in no time!
FAQs: How to Clone Windows 11 to SSD Effortlessly
How do I clone Windows 11 to an SSD?
- Download cloning software (e.g., Macrium Reflect, EaseUS Todo Backup).
- Connect the SSD to your PC.
- Open the cloning software and select Clone Disk or Migrate OS to SSD.
- Choose your current drive as the source and the SSD as the target.
- Start the cloning process and wait for it to complete.
- Boot from the SSD by setting it as the primary drive in the BIOS/UEFI.
How do I move Windows 11 to a new SSD?
- Install the SSD: Physically put the SSD into your computer’s designated slot.
- Get a free tool: Download EaseUS Partition Master (a free program to manage your drives).
- Move Windows to the SSD: Launch EaseUS Partition Master and choose “Migrate OS” to clone your Windows 11 system onto the new SSD.
- Restart and choose your SSD: Reboot your computer and enter the BIOS settings (consult your motherboard manual if needed) to set the SSD as the primary boot drive.
- Enjoy the speed! Restart your computer again, and now Windows 11 will run from your SSD, giving you a noticeable performance boost!
Does Windows 11 have a migration tool?
No, Windows 11 does not have a migration tool.
While upgrading to Windows 11 is exciting, there isn’t a built-in tool to move your entire system to a new hard drive. Don’t worry! Easy-to-use software like EaseUS Partition Master can help you migrate your Windows 11 smoothly.
Can you replace SSD without reinstalling Windows?
Yes! To replace SSD without reinstalling Windows, do the following:
- Install the SSD: Physically put the SSD into your computer following your computer’s manual.
- Migrate the OS: Use a free program called EaseUS Partition Master to copy your operating system to the SSD. Search online for “[download EaseUS Partition Master]”.
- Set SSD as a boot drive: Tell your computer to start from the SSD instead of the old hard drive. This is usually done in BIOS settings; refer to your computer’s manual for instructions.
Back up and wipe old drive: Once everything is running from the SSD, copy important files from your old hard drive and then erase the old drive to use for extra storage.
How do I create a new drive in Windows 11?
- Press Windows + X and select Disk Management.
- Locate unallocated space on your disk.
- Right-click the unallocated space and select New Simple Volume.
- Follow the wizard to assign a size, drive letter, and file system (e.g., NTFS).
- Click Finish to create the new drive.
How do I create or move Windows 11 from an HDD to an SSD?
- Download migration software (e.g., Macrium Reflect, EaseUS Partition Master).
- Connect the SSD to your PC.
- Open the software and select Migrate OS to SSD or Clone Disk.
- Choose the HDD as the source and the SSD as the target.
- Start the migration process and wait for it to finish.
- Set the SSD as the boot drive in BIOS/UEFI after migration.
How do I upgrade my hard drive in Windows 11?
- Back up your data.
- Install the new drive (HDD/SSD).
- Clone your old drive using cloning software.
- Set the new drive as the boot drive in BIOS/UEFI.
- Verify Windows 11 boots from the new drive.

