Windows 11 allows you full customization like hiding the Search Bar and changing the Taskbar Size. The shortcut of “Quick Access in Windows 11 shows recently accessed files and folders. With time, it becomes cluttered with outdated or irrelevant items which slows down file explorer performance and makes it harder to find what you need quickly. Additionally, Quick Access creates privacy concerns when you are sharing your computer or giving presentations, it can expose sensitive or personal information. In other words, you are sharing your files with others.
However, clearing the Quick Access list maintains your privacy by ensuring others cannot easily see your recent activities. After clearing the list, you will see organized, relevant, and most recent files and folders with faster navigation within the File Explorer.
In this comprehensive guide, we’ll discuss how to clear the Quick Access list in Windows 11 using the Settings App, File Explorer, Registry Editor, and third-party tools. We’ll also discuss, refreshing pinned items, removing them all at once, and even clearing Quick Access in Microsoft 365 (if you use it).
Let’s get start!
how to delete quick access history in windows 11
Quick Solution:
Here’s how to get rid of your Quick Access in Windows 11 with just a few clicks:
- Open File Explorer > View > Options > Change folder and search options > General > Show recently used files in Quick Access
- To clean things out, click the “Clear” button next to it. This deletes the list of recent files.
Now, let’s move ahead and learn about how to delete your Quick Access list in Windows 11 using various methods:
Related: How to Show or Hide Desktop Icons Windows 11?
Using File Explorer to Clean Up Quick Access List in Windows 11
This method will clear all the file explore history from the Quick Access List.
Follow the simple steps to clean up the quick-access menu:
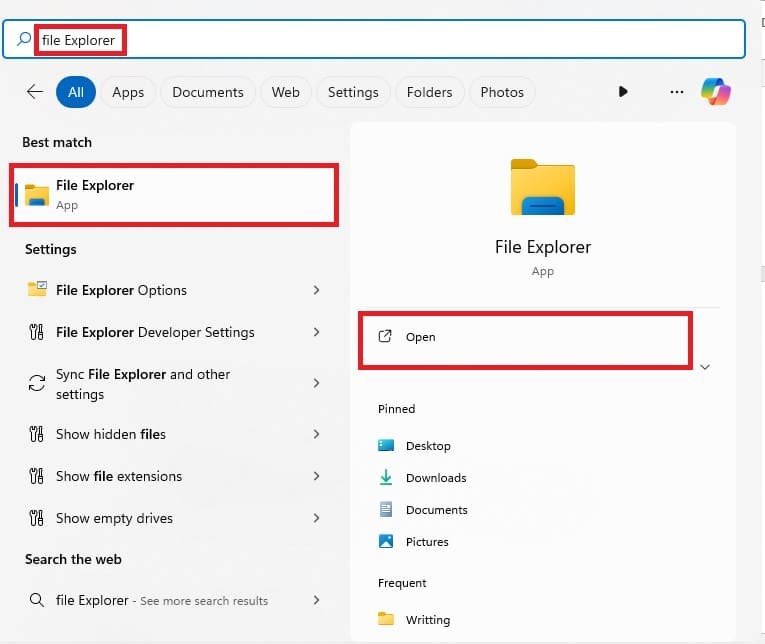
- Press “Win + E” or click the “Start Menu”, type and search for “File Explorer” or find it pinned to the taskbar. Once you find it open it.

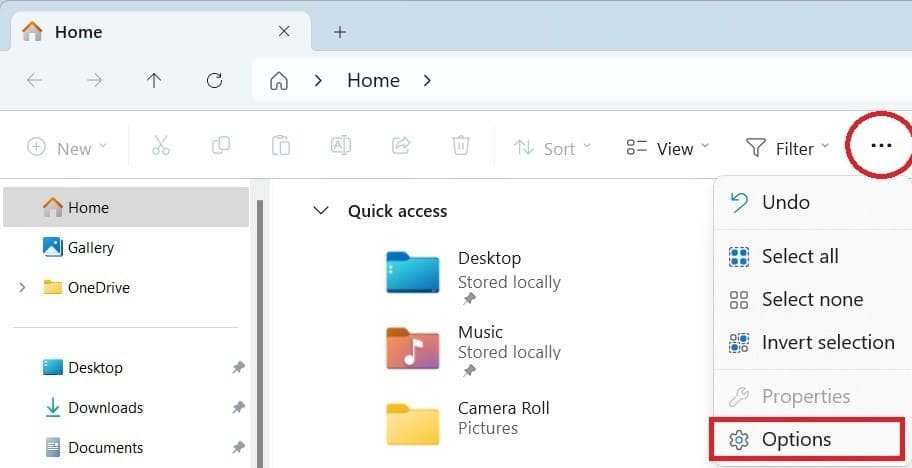
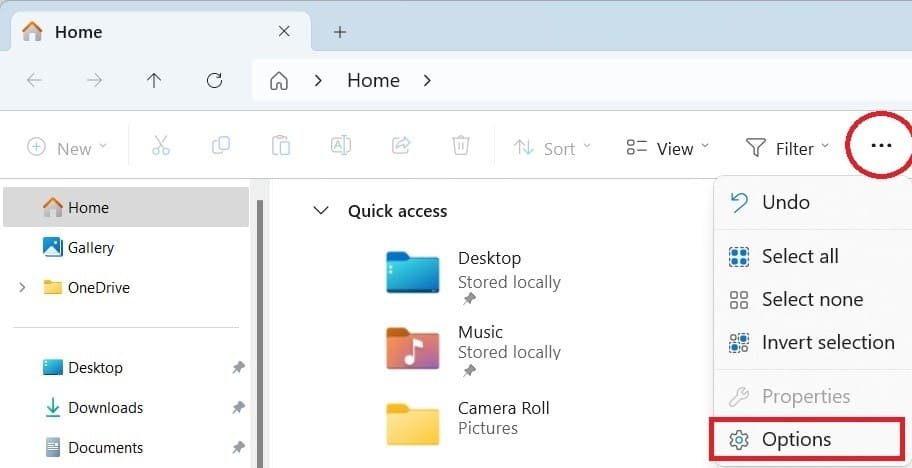
- In the File Explorer window, on the left side, you’ll see “Quick Access.” Click on it and select “Options” from there. If you don’t find it then click on the three dots (More options) in the toolbar at the top and select Options from the dropdown menu.

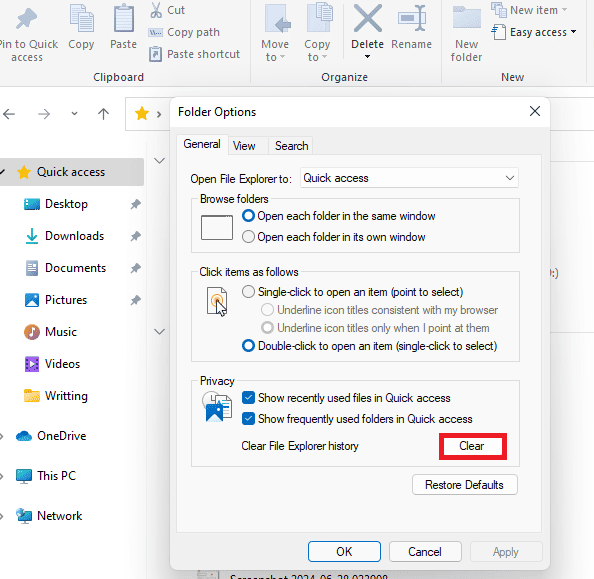
- In the General tab, under the Privacy section, click on the Clear button next to “Clear File Explorer history” to remove all recent files and folders from Quick Access.

- Click OK to save the changes and close the dialog box.
Doing so will clear file explorer history and your Quick Access list is fresh, ready for you to pin your favorite folders for faster access.
Using the Registry Editor to Clear Quick Access List in Windows 11
You can easily use Windows Registry Editor to clear the quick access list in Windows 11 and to achieve this follow the simple steps below:
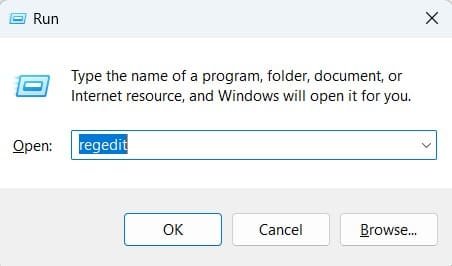
- Press the Windows key + R to open the Run dialog.
- Type “regedit” (without Quotes) and press Enter to open the Registry Editor.

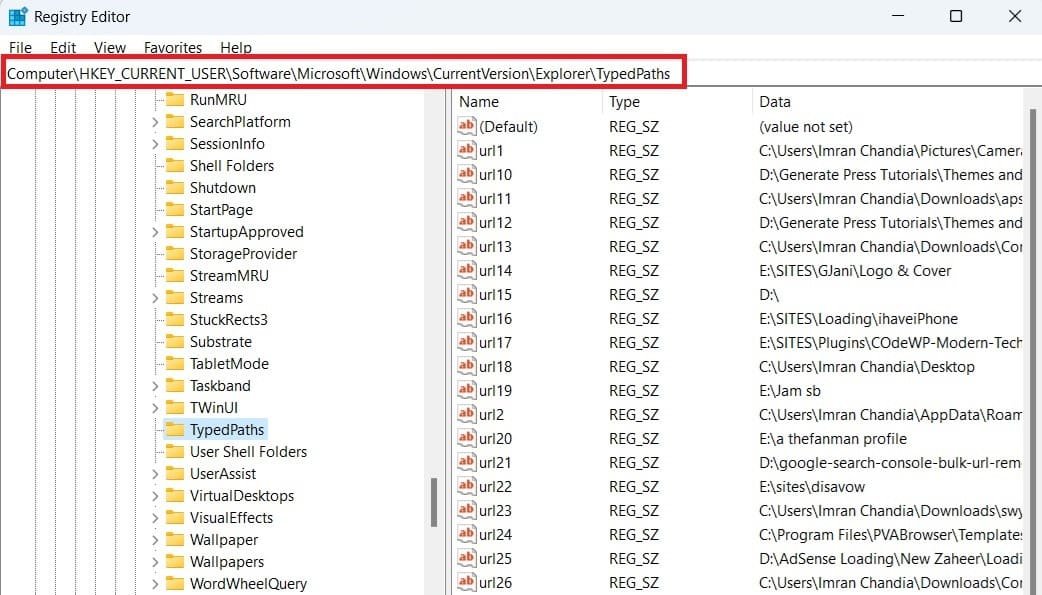
- Navigate to the following registry key:HKEY_CURRENT_USER\Software\Microsoft\Windows\CurrentVersion\Explorer\TypedPaths

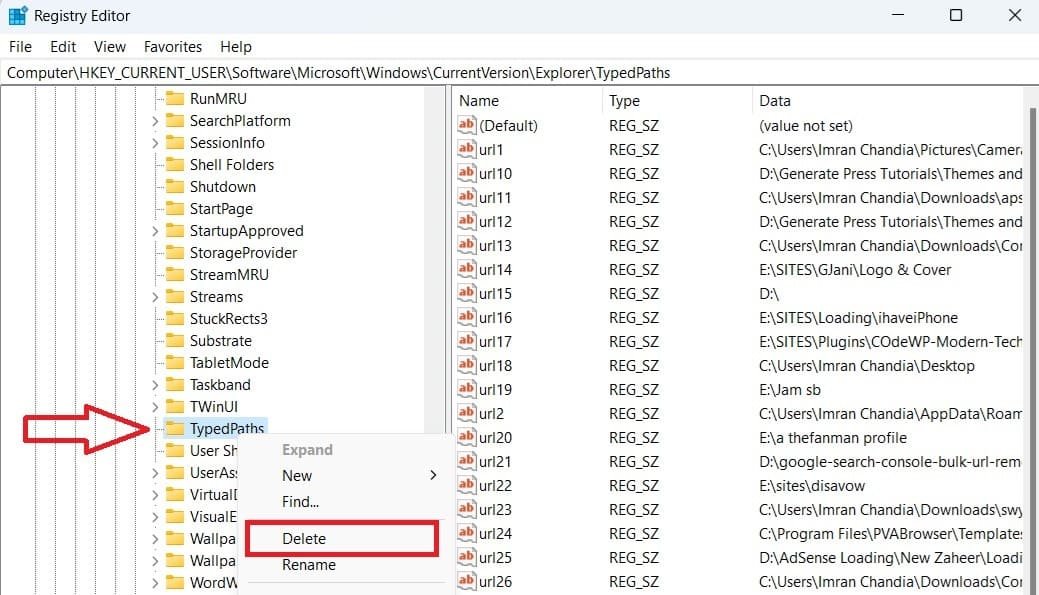
- Right-click on the TypedPaths key and select Delete.

- Close the Registry Editor, and the Quick Access list should be cleared.
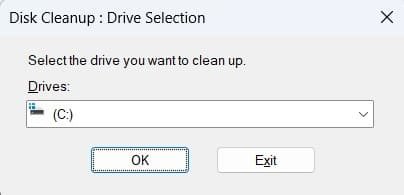
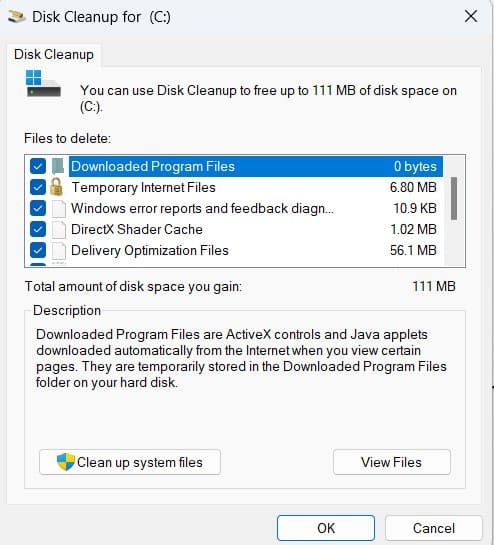
Using Disk Cleanup Method to Remove Quick Access List
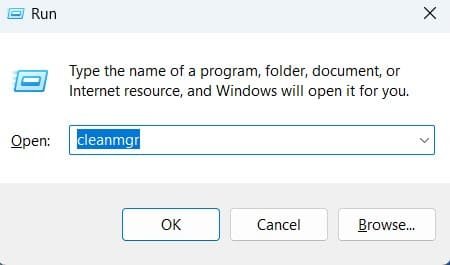
- Press Win+R, type cleanmgr and hit enter.

- In the Disk Cleanup window, select the drive you want to clean (usually C:).

- Check the files you want to delete (select the Recycle Bin, Temporary Internet Files, and Recent options) and then click the Clean up system files button.

- Click OK to start the cleanup process.
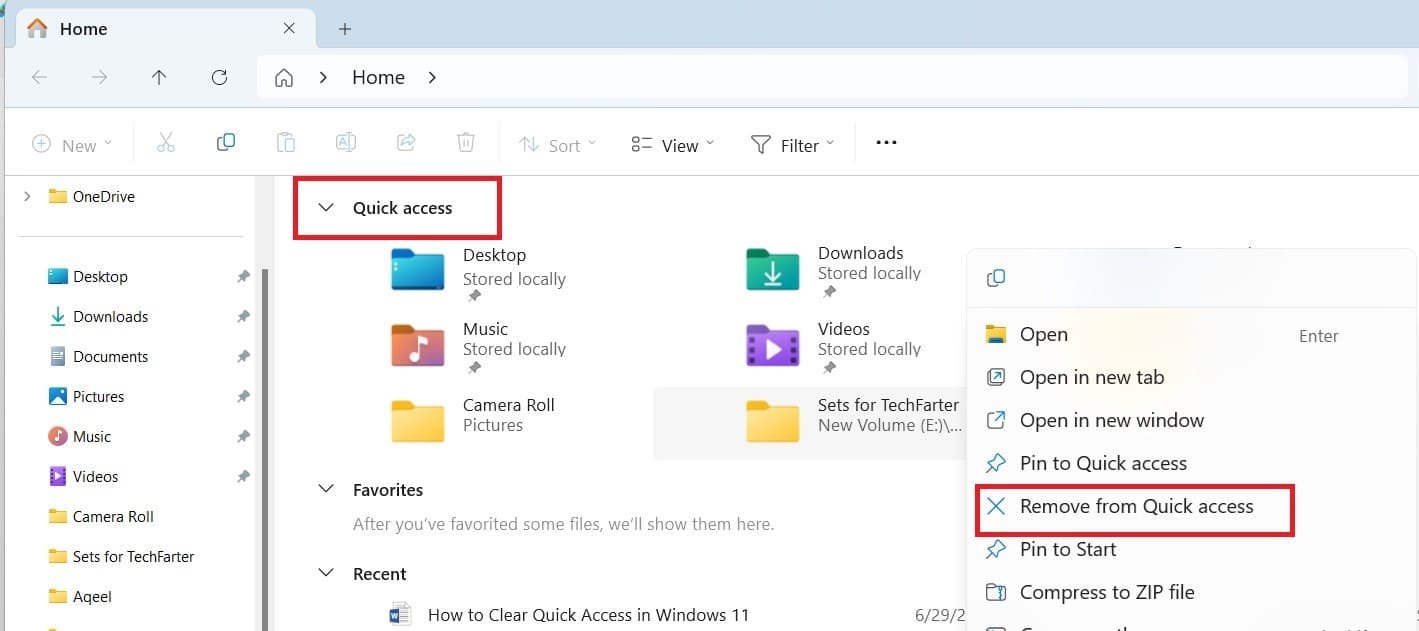
Manually Remove Items from Quick Access in Windows 11
If you do not like the idea of clearing everything (completely removing history) then, you can also remove specific items from your Quick Access list one by one.
Here’s how you can manually delete files or folders from Quick Access on Windows 11:
- Press Win + E and open File Explorer
- You’ll see Quick Access at the right-hand side potion at the top or in the left-hand sidebar, click on Quick Access.
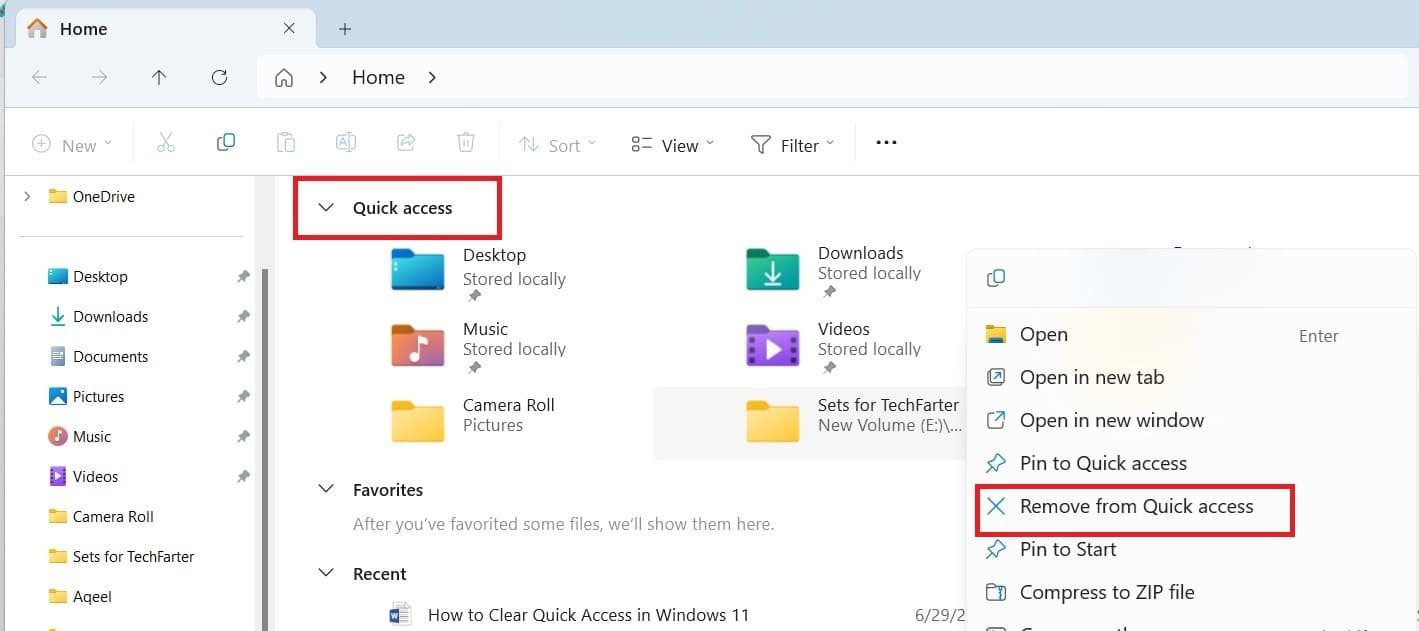
- Right-click on the item you want to remove.
- Select Remove from Quick Access.

This keeps your Quick Access list tidy and full of only the things you use most often.
Turn Off Quick Access Completely By Disabling Recent Files and Frequent Folders
If you want to prevent recent files from being added to the Quick Access list in the future, you can do this through Folder Options.
Follow these steps:
- Go to Start menu and search for “File Explorer” or press “Win + E”.
- Click on the More Options button (three dots) in the toolbar located at the top and select “Options” from the drop down menu.

- In the “Options” window, find the “General” tab. There, you’ll see options “Show recently used files in Quick Access” and “Show frequently used folders in Quick Access” Uncheck the boxes to disable Quick Access completely.
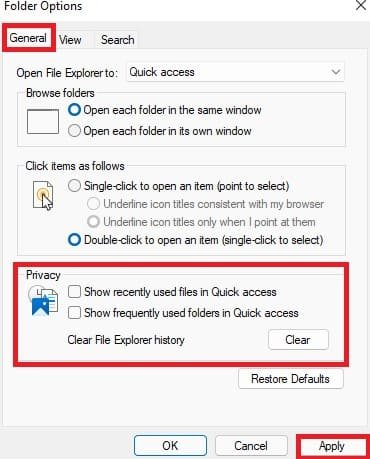
Now, File Explorer won’t show your recent files anymore.
Using the Control Panel to Clear the Quick Access List in Windows 11
Another way to clear the Quick Access list is to use the Control Panel, here is how to do it:
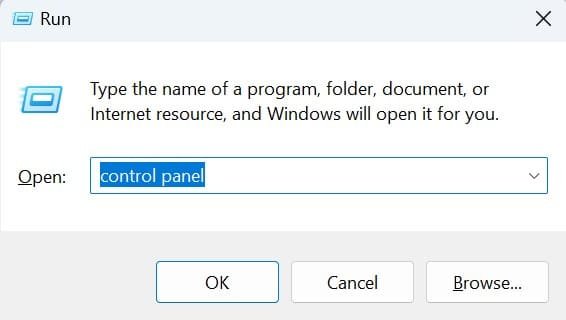
- Search for “Control Panel” in the Start menu and open it. Or press the “Windows key + R” and type “Control Panel” and then hit enter.

- Click “Appearance and Personalization”, then click on “File Explore Options”

- To Clear File Explorer History, click on the General tab by default.
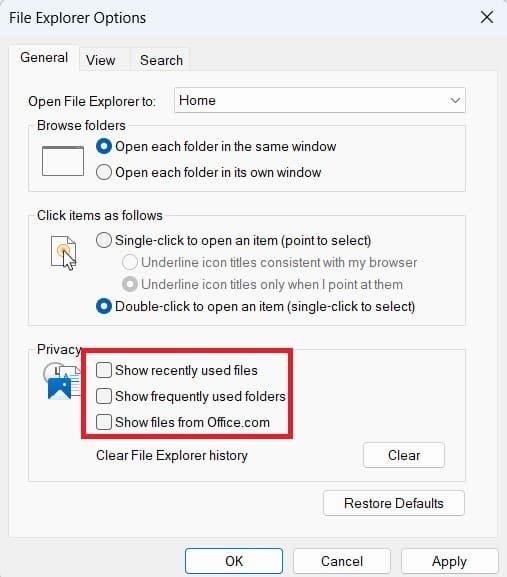
- Under the Privacy section, uncheck all “Show recently used files”, “Show frequently used folders” and “Show files from office.com” and then click on the “Clear” button next to Clear File Explorer history.

- To apply changes, Click on OK and close the window.
By following these steps, you have cleared the Quick Access list in Windows 11.
How to Reset Quick Access Pinned Items
To reset quick access back to its default settings:
- Open File Explorer (by pressing Win + E).
- In the left sidebar, right-click on Quick Access. Or go to “More Options” (click on three dots at the top).

- Select Options from the menu.
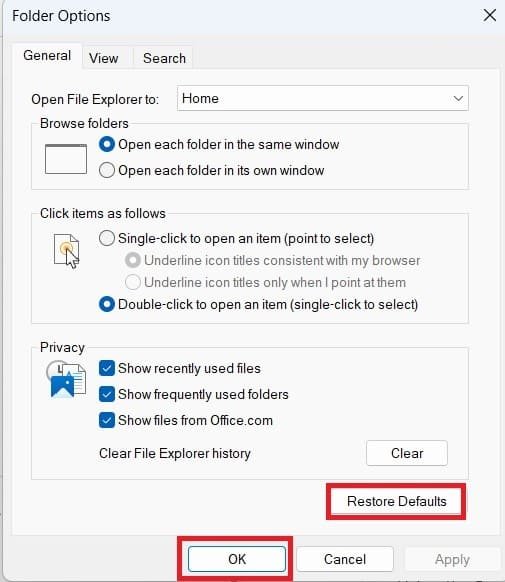
- In the General tab, click the Restore Defaults button to clear pinned items
Click OK to Apply Changes.
Using Third-Party Quick Access Cleaner
Finally, there are special programs (not made by Microsoft) that can also clear your Quick Access list. These programs can be handy, but be careful! Before downloading any, make sure it comes from a trusted source by doing some research online.
Tools like CCleaner, and Wise Disk offer options for cleaning temporary files and browser data, and Quick Access list.
How to Restore Quick Access in Windows 10 and 11
Restore Quick Access in Windows 10
To restore Quick Access toolbar in Windows 10 follow the simple steps below:
- Click on “Options” on the right side.
- In the “Folder Options” window that appears, select the “General” tab.
- Under the “Privacy” section, check the box next to “Show recently used files in Quick access”.
- Click “Apply” and then “OK” to save the changes.
Can’t Find Quick Access in the Recent Updated File Explorer
follow these steps to restore Quick Access toolbar in Windows 11
- Open “File Explorer” by pressing “Win + E”.
- Then select “Options”.
- Go to “General” tab, and then under the ‘Privacy’ section, tick “Show recent used files”, and “Show recently used folders”.
- Click Apply and then OK
What is Quick Access in Windows 11, and how can users manage its location, toolbar, and settings?
Quick Access in Windows 11 is a feature in File Explorer that provides easy access to frequently used folders and recent files. It appears on the left side of File Explorer by default.
- Location: Quick Access can be found in the File Explorer sidebar, and you can show or hide it through File Explorer Options.
- Quick Access Toolbar: This toolbar provides shortcuts for common actions (like copy/paste) and can be customized by right-clicking on it.
- Managing Settings: To remove recent files or folders from Quick Access, go to File Explorer Options and click Clear. You can also adjust settings to enable or disable recent file tracking.
- Fixing Issues: If Quick Access is not visible or not working, ensure it’s enabled in the File Explorer Settings or check for system updates.
By understanding its location and how to manage Quick Access, users can customize their navigation and streamline their workflow in Windows 11.
Conclusion
In short, your Windows 11 computer keeps track of all files and folders you used recently and makes them easier to find again. This can be helpful, but the list can get cluttered and outdated. With these methods, you should be able to clear your Quick Access list in Windows 11, remove unwanted pinned items, or even completely disable the feature if you prefer. You can also remove everything at once, and take out specific files.
FAQs: How to Clear Quick Access in Windows 11? All Methods
How Do I Clear Defaults in Windows 11?
Answer: In Windows 11, you can’t directly clear all defaults at once. But you can reset them to what Microsoft recommends:
- Open Settings (Win+I).
- Click “Apps” then “Default apps“.
- Click the “Reset” button for “Reset all default apps“.
- Confirm by clicking “OK“.
This will set all file openers back to Microsoft’s choices
How Do I Unpin All Items In Quick Access?
Answer: There is not a one-click way to remove everything from Quick Access in File Explorer, but it’s easy to do one by one. Here’s how:
- Open File Explorer (press Windows key + E).
- On the left side, you’ll see “Quick Access.” Click the arrow next to it to expand the list.
- Right-click on any folder you want to remove.
- Choose “Unpin from Quick Access.”
Repeat steps 3 and 4 for each folder you want to take off the list. This will keep your Quick Access clean and only show the folders you use often.
How to Clear Quick Access in Microsoft 365?
Answer: Unfortunately, there is not a direct way to completely clear the Quick Access list in Microsoft 365 applications like Word or Excel. However, you can easily remove individual files you don’t want to see anymore.
Here’s how to do it:
- Open your Microsoft 365 application (like Word or Excel).
- Look for the file you want to remove in the Quick Access list. This list is usually on the left side of the window.
- Hover your mouse over the file name. You’ll see some small dots appear on the right.
- Click on those dots and a menu will appear.
- Choose “Remove from Quick Access” from the menu.
That’s it! The file will disappear from your Quick Access list.
How can users delete and clear Quick Access history and recent files in Windows 11?
To delete and clear Quick Access history and recent files in Windows 11:
- Open File Explorer (press
Win + E). - Go to Folder Options: Click the three dots in the toolbar, then select Options.
- In the Privacy section, click Clear to delete Quick Access history and recent files.
- To prevent future tracking, uncheck the options Show recently used files in Quick Access and Show frequently used folders in Quick Access.
- To remove pinned items from Quick Access, right-click on them and select Unpin from Quick Access.
This will clear the Quick Access history and stop future tracking of recent files.
How can users disable or hide Quick Access and recent files in Windows 11?
To disable or hide Quick Access and recent files in Windows 11:
- Turn Off Quick Access: Open File Explorer Options (three dots > Options) and uncheck Show recently used files and Show frequently used folders in Quick Access.
- Hide Quick Access: Right-click Quick Access in the sidebar and select Remove from Quick Access. Alternatively, you can disable Quick Access completely through the Registry Editor for more advanced control.
- Disable Recent Files: To stop recent files from showing up, uncheck Show recent files in Quick Access in the File Explorer Options and select Don't show recent files in the Taskbar settings.
This will turn off Quick Access and prevent recent files from displaying in File Explorer and on the Taskbar in Windows 11.
How can users reset, restore, or manage Quick Access settings in Windows 10 and 11, including clearing history and disabling it?
To manage Quick Access in Windows 10 and 11:
- Reset Quick Access: Go to File Explorer Options > Clear under Privacy to reset history.
- Restore Quick Access (Windows 11): Enable Show recently used files and Show frequently used folders in File Explorer Options.
- Unpin Items: Right-click on items in Quick Access and select Unpin from Quick Access.
- Disable or Hide Quick Access: In File Explorer Options, uncheck Show recent files and Show frequently used folders. To fully disable, use the Registry Editor (Windows 10) or unpin in Windows 11.
These steps allow users to reset, restore, or manage Quick Access settings.

