YouTube is a popular platform for sharing videos, but has specific requirements for the formats it accepts. While MKV is an adaptive and high–quality format, it’s not directly supported by YouTube.
So, how can you upload an MKV file to YouTube? Get your answer in this comprehensive guide.
Before diving into the article, I would like to share the Quick Highlights of this article with you.
Highlights
This article focuses mainly on:
1. The process of conversion of an MKV file to MP4.
2. The process to upload the converted file on YouTube.
Here is the table of contents so you can dive into any article section just by clicking the section you want to read.
Converting MKV Files to YouTube Supported Formats
The first step in uploading an MKV file to YouTube is to convert MKV to YouTube format. YouTube supports many video formats, including MOV, 3GP, MPEG-4, FLV, AVI, WMV, and WebM.
As you can see, MKV isn‘t included in the list, so that we will use MP4. It is highly recommended because it is high–quality and requires less space.
Using Simple Trick
This trick is more accessible and saves time, but please note that:
Note:
“Please make a copy of the file you want to convert and save it because this method can lead to file misbehaviour sometimes and your important data may be lost.“
TechFarter
This simple method works as follows:
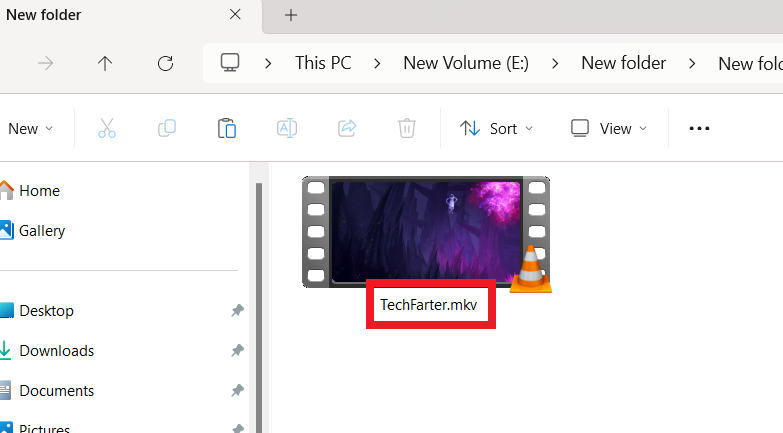
Step 1: Many file formats are usually represented in their file name. For Example, Suppose you have a file named (TechFarter.mkv). As it is presented in this picture:
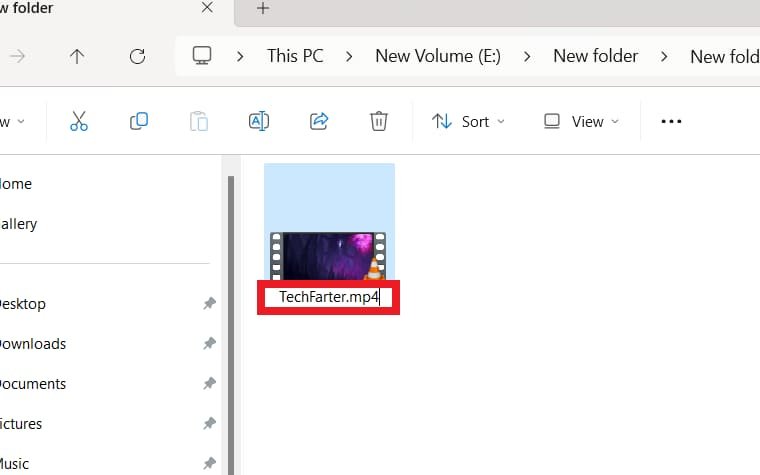
Step 2: Rename the file format after the (.) by writing the format you want. In this case, we will convert MKV to Mp4 by changing the format after the dot. Such as:
Step 3: Afterward, you may get a warning saying, “ If you change a file name extension, the file may misbehave.”

Step 4: Click “Yes” to convert your file to MP4.
This general method usually helps a lot and saves time during work hours.
Using Video Converters
There are many video converters available that can help you convert your MKV files to MP4 or other YouTube–compatible formats. OBS Studio and VLC Media Player are also among them.
OBS Studio is an app that can also help your YouTube career, so you should consider downloading it.
These softwares can convert your MKV files to a format suitable for YouTube, like MP4, FLV, AVI, WMV, or WebM. They also allow you to adjust video and audio parameters like aspect ratio, resolution, and frame rate to optimize your video for YouTube.
Using OBS Studio
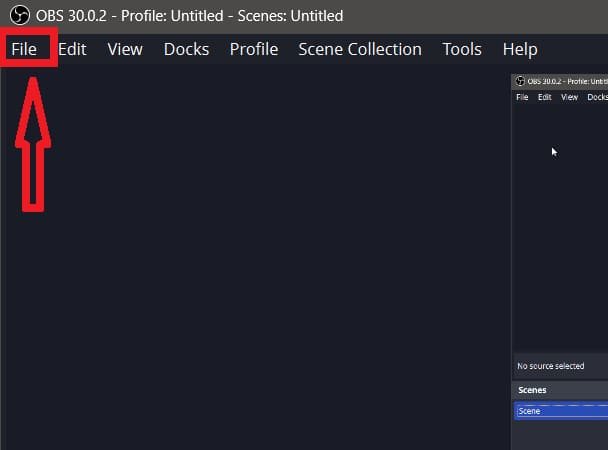
You can use OBS Studio to convert MKV files to MP4. OBS Studio, or Open Broadcaster Software, has a built–in feature that converts MKV files to MP4. Here’s how you can do it:
- Open OBS Studio: Launch the OBS Studio application on your computer.
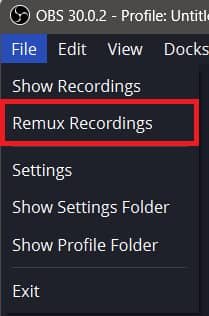
- Go to File: In the top menu bar, click “File.”

- Remux Recordings: In the drop–down menu, select “Remux Recordings.”

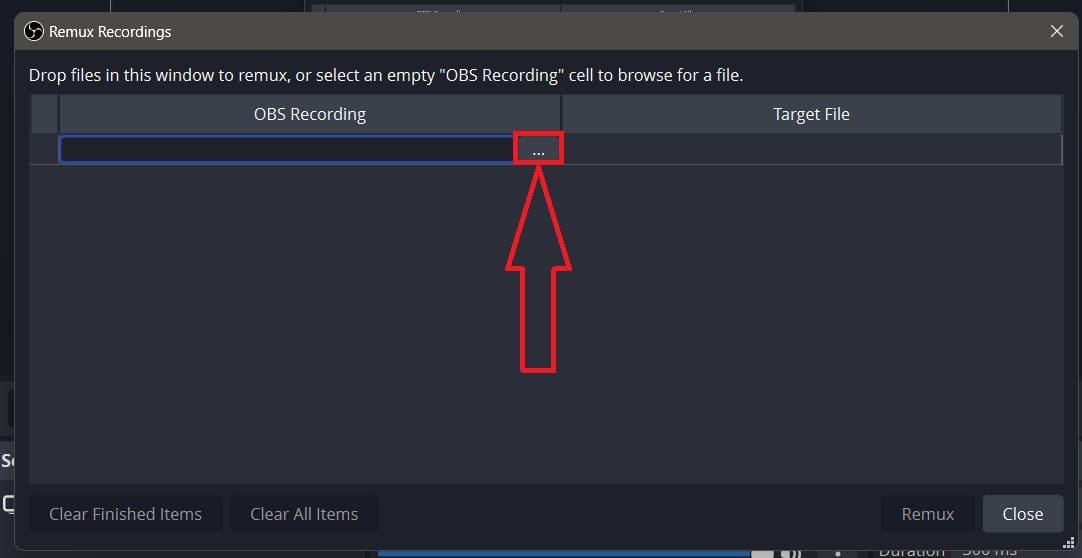
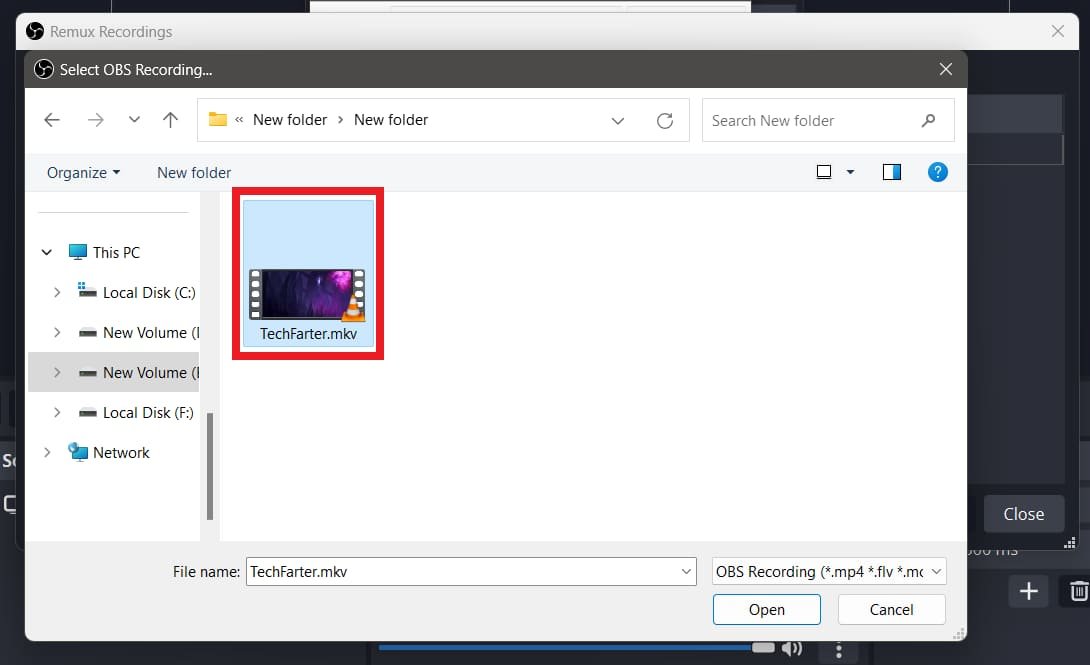
- Select the MKV file: In the new window, click the “…” button.

- Browse and select the MKV file you want to convert.

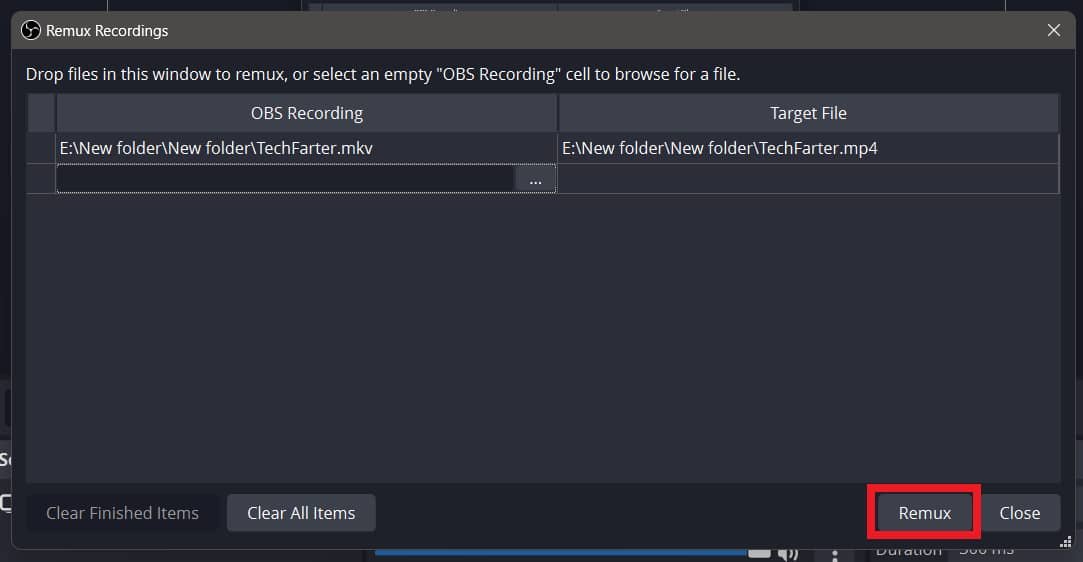
- Start Remuxing: After selecting the file, click “Remux” to start the conversion process.

The converted MP4 file will be saved in the exact location as the original MKV file.
Note:
“Please note that the exact steps may vary depending on the version of OBS Studio you are using. Always use the latest version of the software for the best results.”
Also, OBS Studio has an option in its settings to convert to MP4 after recording automatically. You can find this option under Settings -> Advanced -> Recording -> Automatically remux to MP4.
This can be useful if you frequently record in MKV format and want to avoid the manual converting process each time.
Using VLC Media Player
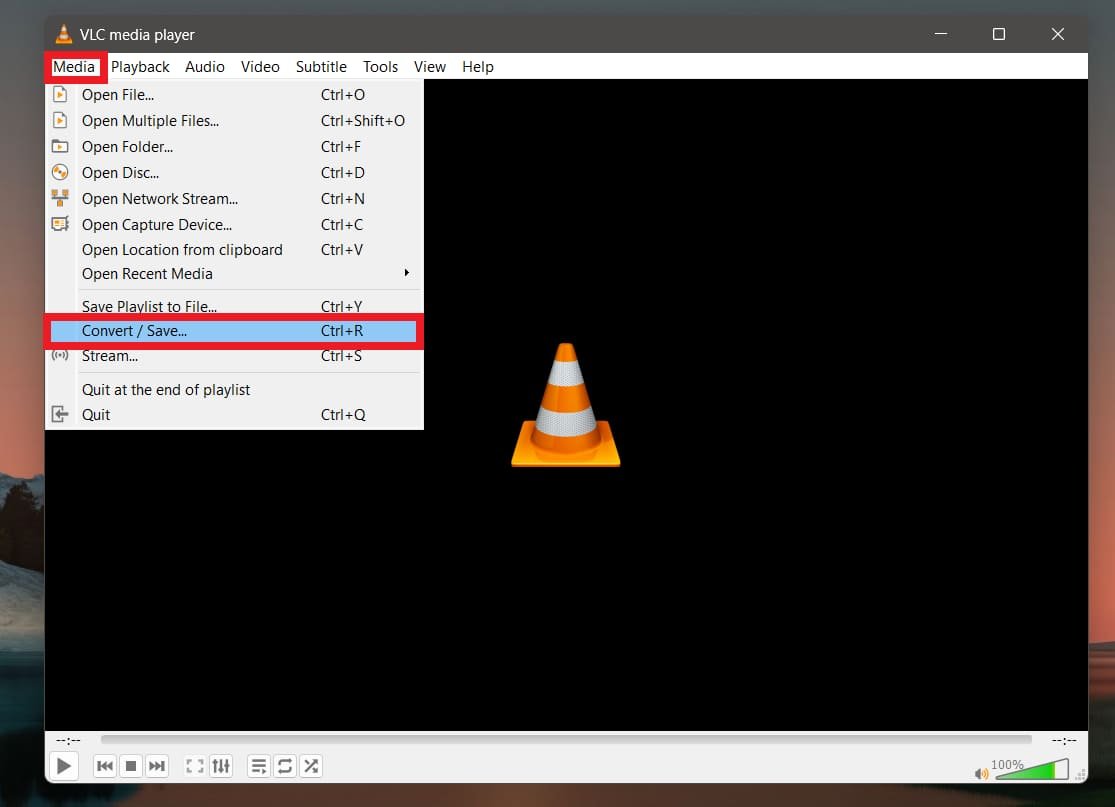
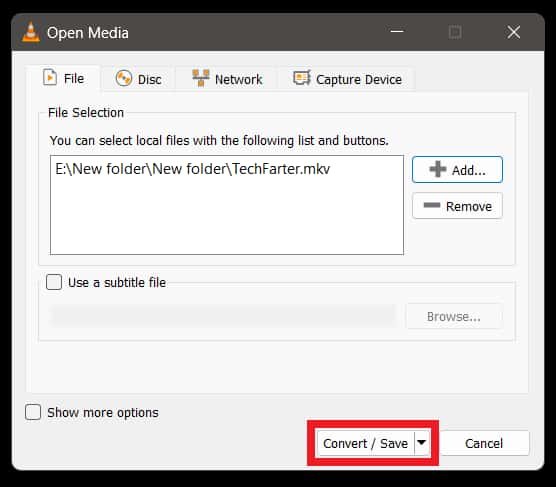
VLC Media Player is a famous app to watch videos. You can get it from here. To convert your files to MP4 format by using VLC, you will have to follow these steps:
Uploading the Converted Video to YouTube
Once you’ve converted your MKV file to a YouTube-compatible format, you can upload it to YouTube.
- Launch YouTube: Open YouTube in your web browser or mobile app.
- Sign in: Log in to your YouTube account.
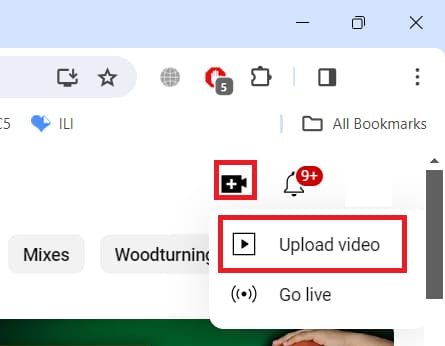
- Upload video: Click the ‘Create’ button at the top right corner and choose ‘Upload video.’

- Select file: Click ‘Select Files to Upload’ and choose the converted file from your computer.

- Enter video details: Fill in the video information like title, description, and tags.

- Publish: Click ‘Publish’ to upload your video.
Conclusion
Uploading MKV files to YouTube involves an extra conversion step, but it‘s straightforward with the right tools and steps. You can upload high–quality videos by converting your MKV files to a YouTube–compatible format.
I hope this article helps you successfully upload your MKV files to YouTube. Happy uploading!
Disclaimer: Please ensure you have the rights and permissions for the content you upload to YouTube.
FAQs: How to Upload MKV Files to YouTube?
Can I directly upload MKV files to YouTube without converting them?
No, YouTube does not directly support MKV files. You need to convert your MKV files to a compatible format like MP4, MOV, AVI, etc., before uploading them to YouTube.
Are there any risks involved in using the simple trick of renaming the file format to convert MKV to MP4?
While the simple trick of renaming the file format can be convenient, there is a risk of file misbehavior or potential data loss. It‘s advisable to make a copy of your original MKV file before attempting this method.
Which software can I use to convert MKV files to MP4 for uploading to YouTube?
Several software options are available for converting MKV files to MP4, including OBS Studio and VLC Media Player. These tools offer user–friendly interfaces and various customization options to optimize your video for YouTube uploading.

