Virtual memory is a critical component of Windows 11 memory management. It allows the system to use a portion of the hard drive or SSD as virtual RAM when physical memory (RAM) is insufficient. This ensures system performance in Windows 11 remains smooth, even when running memory-intensive applications. This guide will explore how to see virtual memory in Windows 11, check its current size, and adjust its settings to optimize performance.
You will also learn how to check RAM type, open and use the Command Prompt, and system settings to monitor and modify the paging file efficiently.
What is virtual memory in Windows?
Virtual memory is an extension of RAM (Random Access Memory) that allows Windows 11 to store temporary data on the hard drive when physical memory is exhausted. This process helps prevent system freezing, sluggish performance, and memory bottlenecks.
How Virtual Memory Works
- Paging File (Pagefile.sys): A hidden system file used for memory paging.
- Swap File: Used by Windows for system performance optimization.
- Memory Allocation: Dynamically allocated based on system resources and user-defined settings.
- Automatic vs. Manual Paging File Management: Windows can manage virtual memory automatically, or users can configure it manually for better control.
How to See Virtual Memory in Windows 11
There are multiple methods to view virtual memory settings in Windows 11. Here’s how you can do it:
See Virtual Memory by using Advanced System Settings
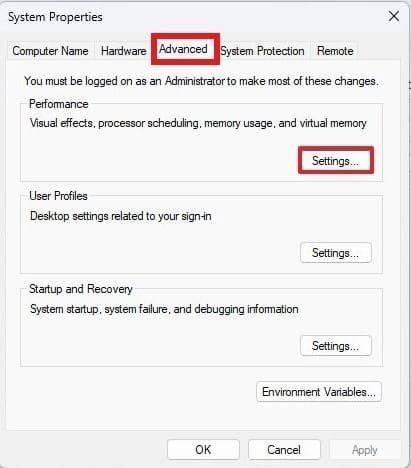
- Open System Properties: Press
Win + R, typesysdm.cpl, and press Enter. - Navigate to the Advanced > Performance section and click Settings.

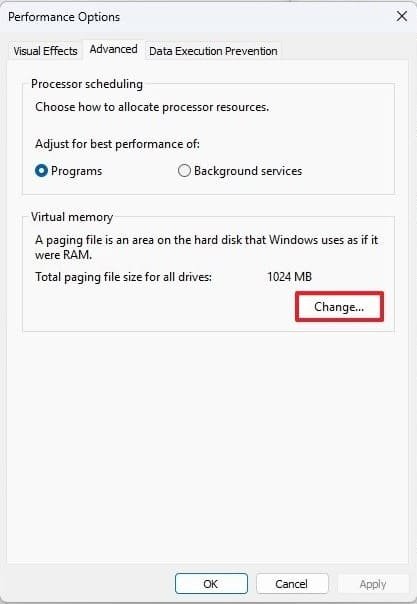
- In the Performance Options window, go to the Advanced tab.
- Under Virtual Memory, click Change to view and modify settings.

Checking Virtual Memory via Command Prompt
To check virtual memory size in Windows 11 using Command Prompt, follow these steps:
- Open Command Prompt as an administrator (
Win + X> Terminal (Admin)). - Type the following command and press Enter:
wmic pagefile list /format:list - This command will display the Windows 11 paging file size, its location, and status.


See Virtual Memory in Windows 11 by Using Task Manager
- Press
Ctrl + Shift + Escto open Task Manager. - Go to the Performance tab.
- Click on Memory to see the Windows 11 swap file size and current memory allocation.
How to Check Paging File Details in Windows 11 Settings
To view page file size in Windows 11 and other details:
- Open Settings (
Win + I), then go to System > About. - Click Advanced System Settings and navigate to Performance > Advanced.
- Click Change under Virtual Memory.
- You will see the current page file. Sys Windows 11 location and size.
How to Increase Virtual Memory Manually in Windows 11
If you experience a low virtual memory warning in Windows 11, increasing the paging file size can help.
Steps to Increase Virtual Memory
- Open Advanced System Settings (
Win + R, typesysdm.cpl, press Enter). - Go to Performance Settings > Advanced > Virtual Memory > Change.
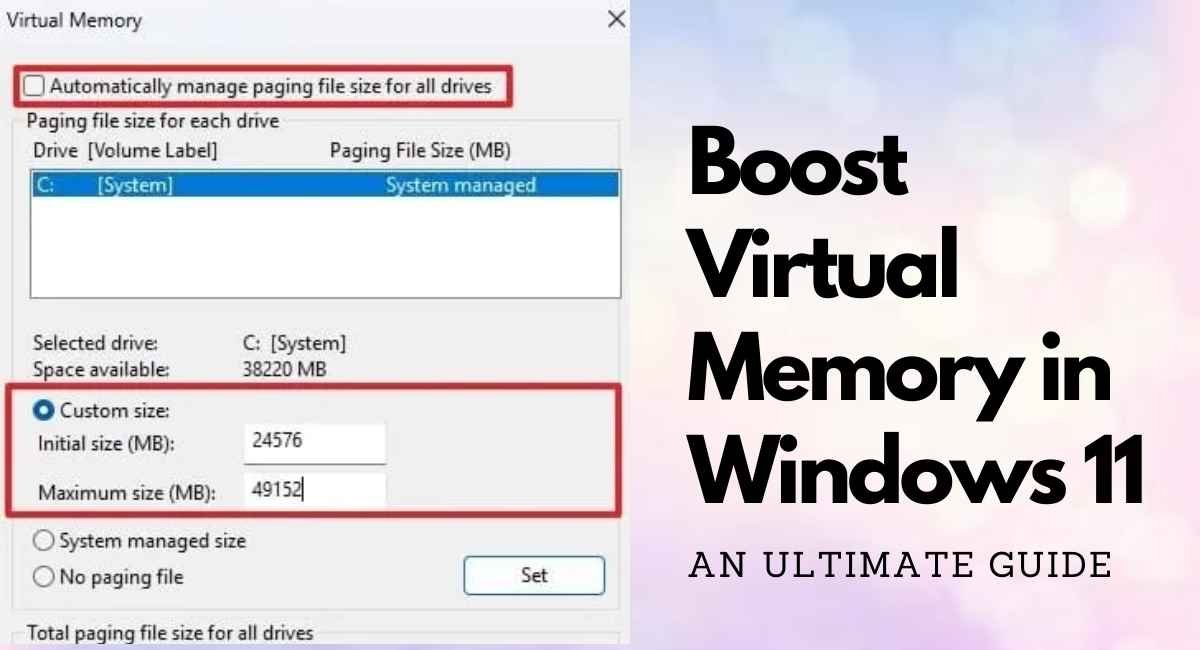
- Uncheck Automatically manage paging file size for all drives.
- Select the drive where the pagefile.sys is located.
- Choose Custom Size and enter values for Initial Size and Maximum Size.
- Click Set, then OK, and restart your computer.


Recommended Virtual Memory Settings
- Minimum: 1.5x the total RAM installed.
- Maximum: 3x the total RAM installed.
How to Optimize Windows 11 Memory Settings
To optimize Windows 11 memory settings, follow these best practices:
Free Up RAM in Windows 11
- Close unnecessary background apps.
- Disable startup programs using
Task Manager > Startup. - Use Windows Memory Diagnostic to check for RAM issues.
Manage Memory Allocation in Windows 11
- Enable Windows 11 automatic paging file management.
- Use ReadyBoost if you have a compatible USB drive.
Fix Low Virtual Memory Warning in Windows 11
- Expand the virtual memory size in Windows 11.
- Install more RAM for better performance.
- Upgrade to an SSD for faster swap file operations.
Advanced Virtual Memory Configurations
Using WMIC Commands
To manually adjust the pagefile.sys size using WMIC, use:
wmic computersystem where name="%computername%" set AutomaticManagedPagefile=false
wmic pagefileset where name="C:\\pagefile.sys" set InitialSize=YOUR-INIT-SIZE,MaximumSize=YOUR-MAX-SIZE
shutdown -r -t 00
To return to automatic memory management:
wmic computersystem where name="%computername%" set AutomaticManagedPagefile=true
Conclusion
Knowing how to see virtual memory in Windows 11 is crucial for maintaining computer performance. You can use system settings, Task Manager, or Command Prompt to check and adjust your virtual memory. By optimizing the paging file settings, you can enhance system performance in Windows 11, prevent memory bottlenecks, and improve overall responsiveness.
FAQs: How to See Virtual Memory in Windows 11
How to Check Pagefile Usage in Windows 11?
Use wmic pagefile list /format:list in Command Prompt.
Difference Between Virtual Memory and RAM?
RAM is fast, physical memory, while virtual memory is a temporary extension stored on the hard drive.
Can I disable virtual memory in Windows 11?
It is not recommended as it can cause system instability.
Bounce:
How to Clone a Hard Drive to SSD Windows 11?
How to Allocate SSD in Windows 11: A Comprehensive Guide